Halloween is arguably the most creative time of the year.
Millions of people all around the country put together extravagant costumes, decorating houses, and, of course, carving the spooky pumpkins to set outside our doors. Instead of shelling out cash for those cheap carving kits this year, how about using your Leatherman instead? Your multitool is a great way to design and carve a ghoulish face or try to emulate your favorite spooky villain into the side of a pumpkin.
Tools You’ll Need
Basic pumpkin carving is not an intricate affair, and you’ll find most of the tools you need on almost every multitool that Leatherman makes. For the purpose of this task, we chose to utilize the ever-popular Wave +.
We were able to outline our design into the side of the pumpkin, carve and perform a few touch-ups with just five tools: the knife, serrated knife, the saw, the small bit driver, and the file. You might get more mileage out of your multi-tool, depending on which one you’re using, but these tools should get the job done easily.
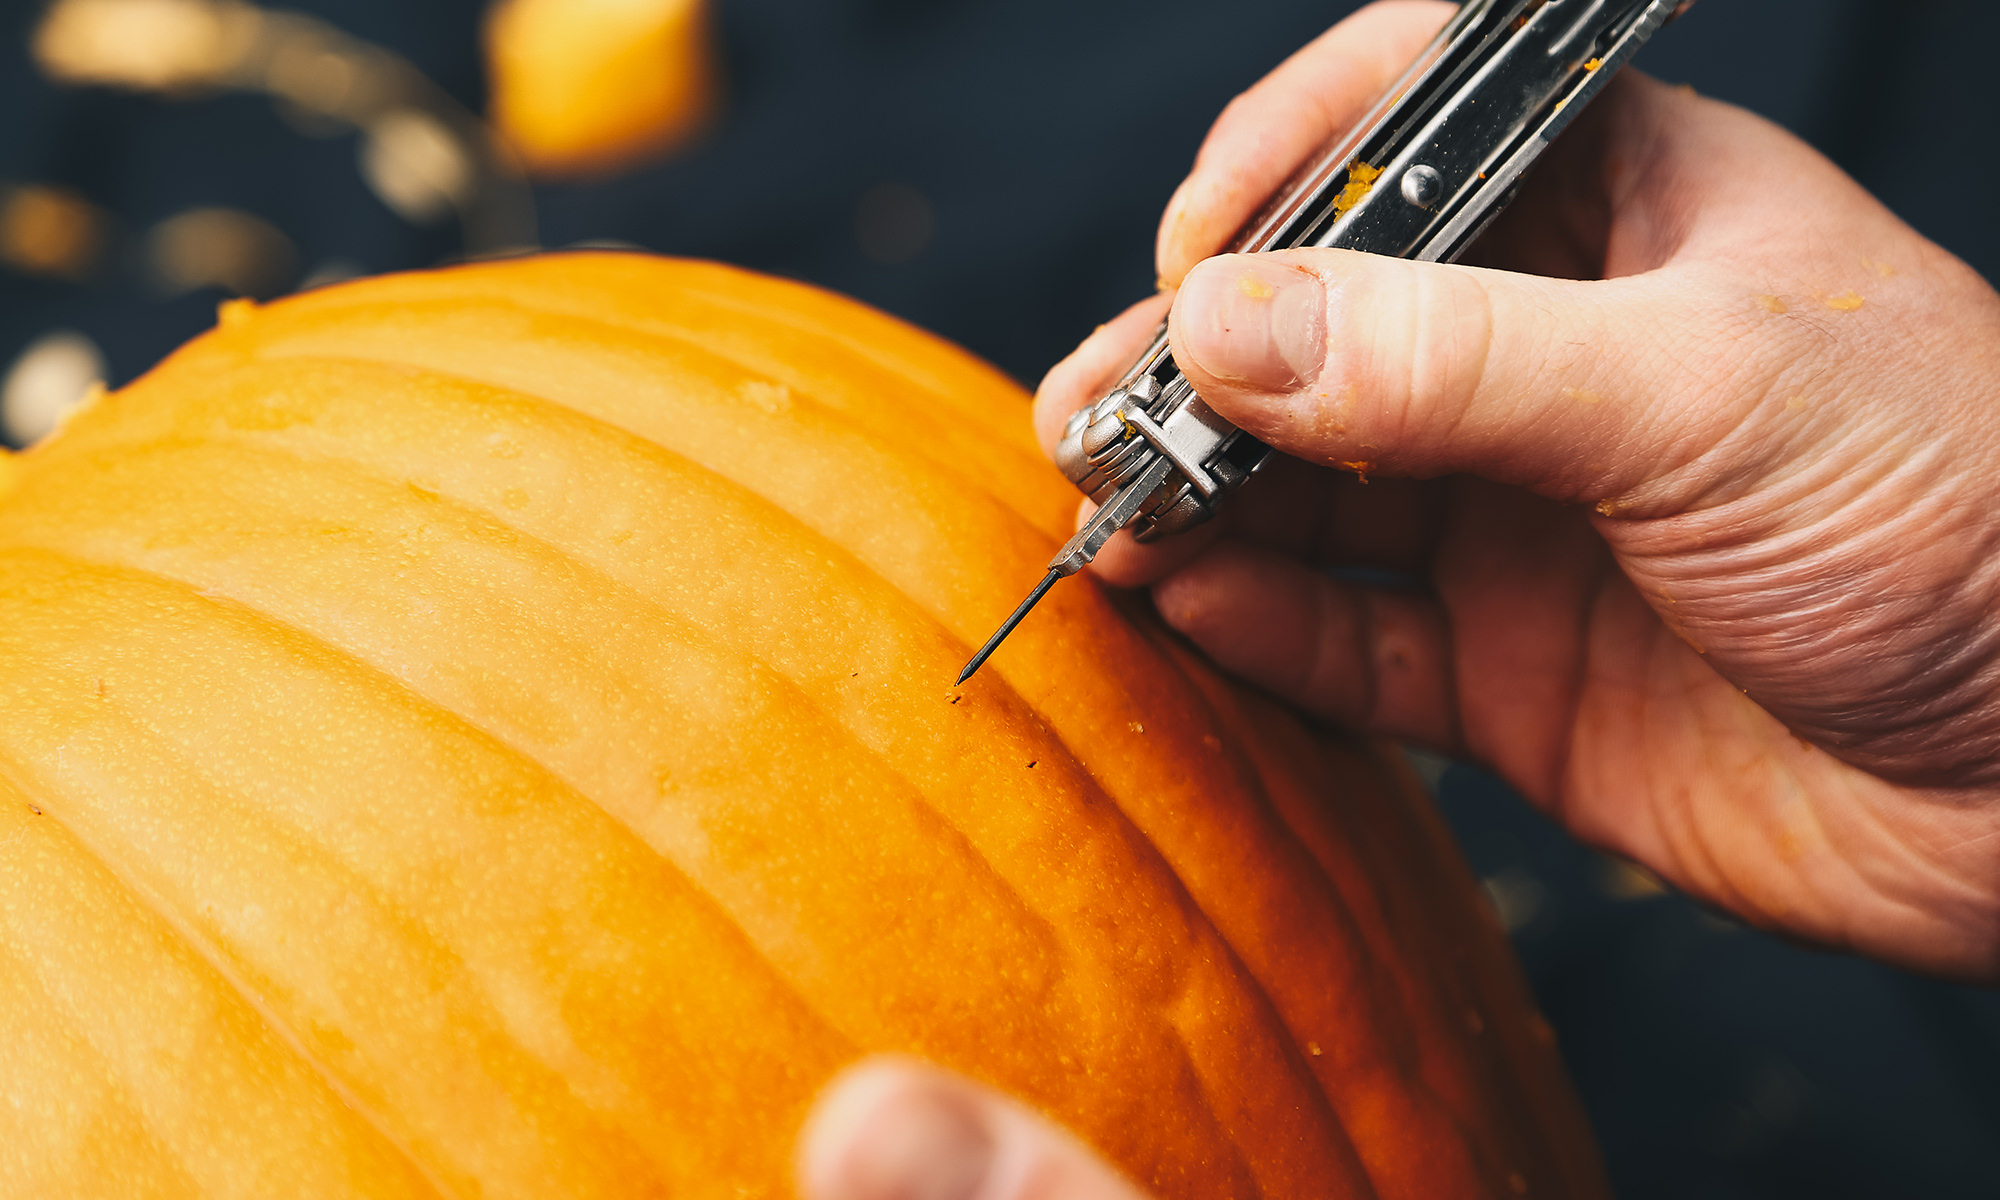
The Driver
When carving a pumpkin you have two options—choose your own design or copy one you find online or in the store.
Transferring a design onto the pumpkin is easily accomplished with the small bit driver on your Leatherman. The driver is the perfect shape and size to make the small indentations needed to transfer the outline, with going too deep in case you want to make changes. It easily pokes through paper, or can be used to create a unique outline of your own to use as a guide for your knife.
You can also use it like a pencil and draw a light line barely visible to the naked eye. Then you’re ready for the hard work: the carving!
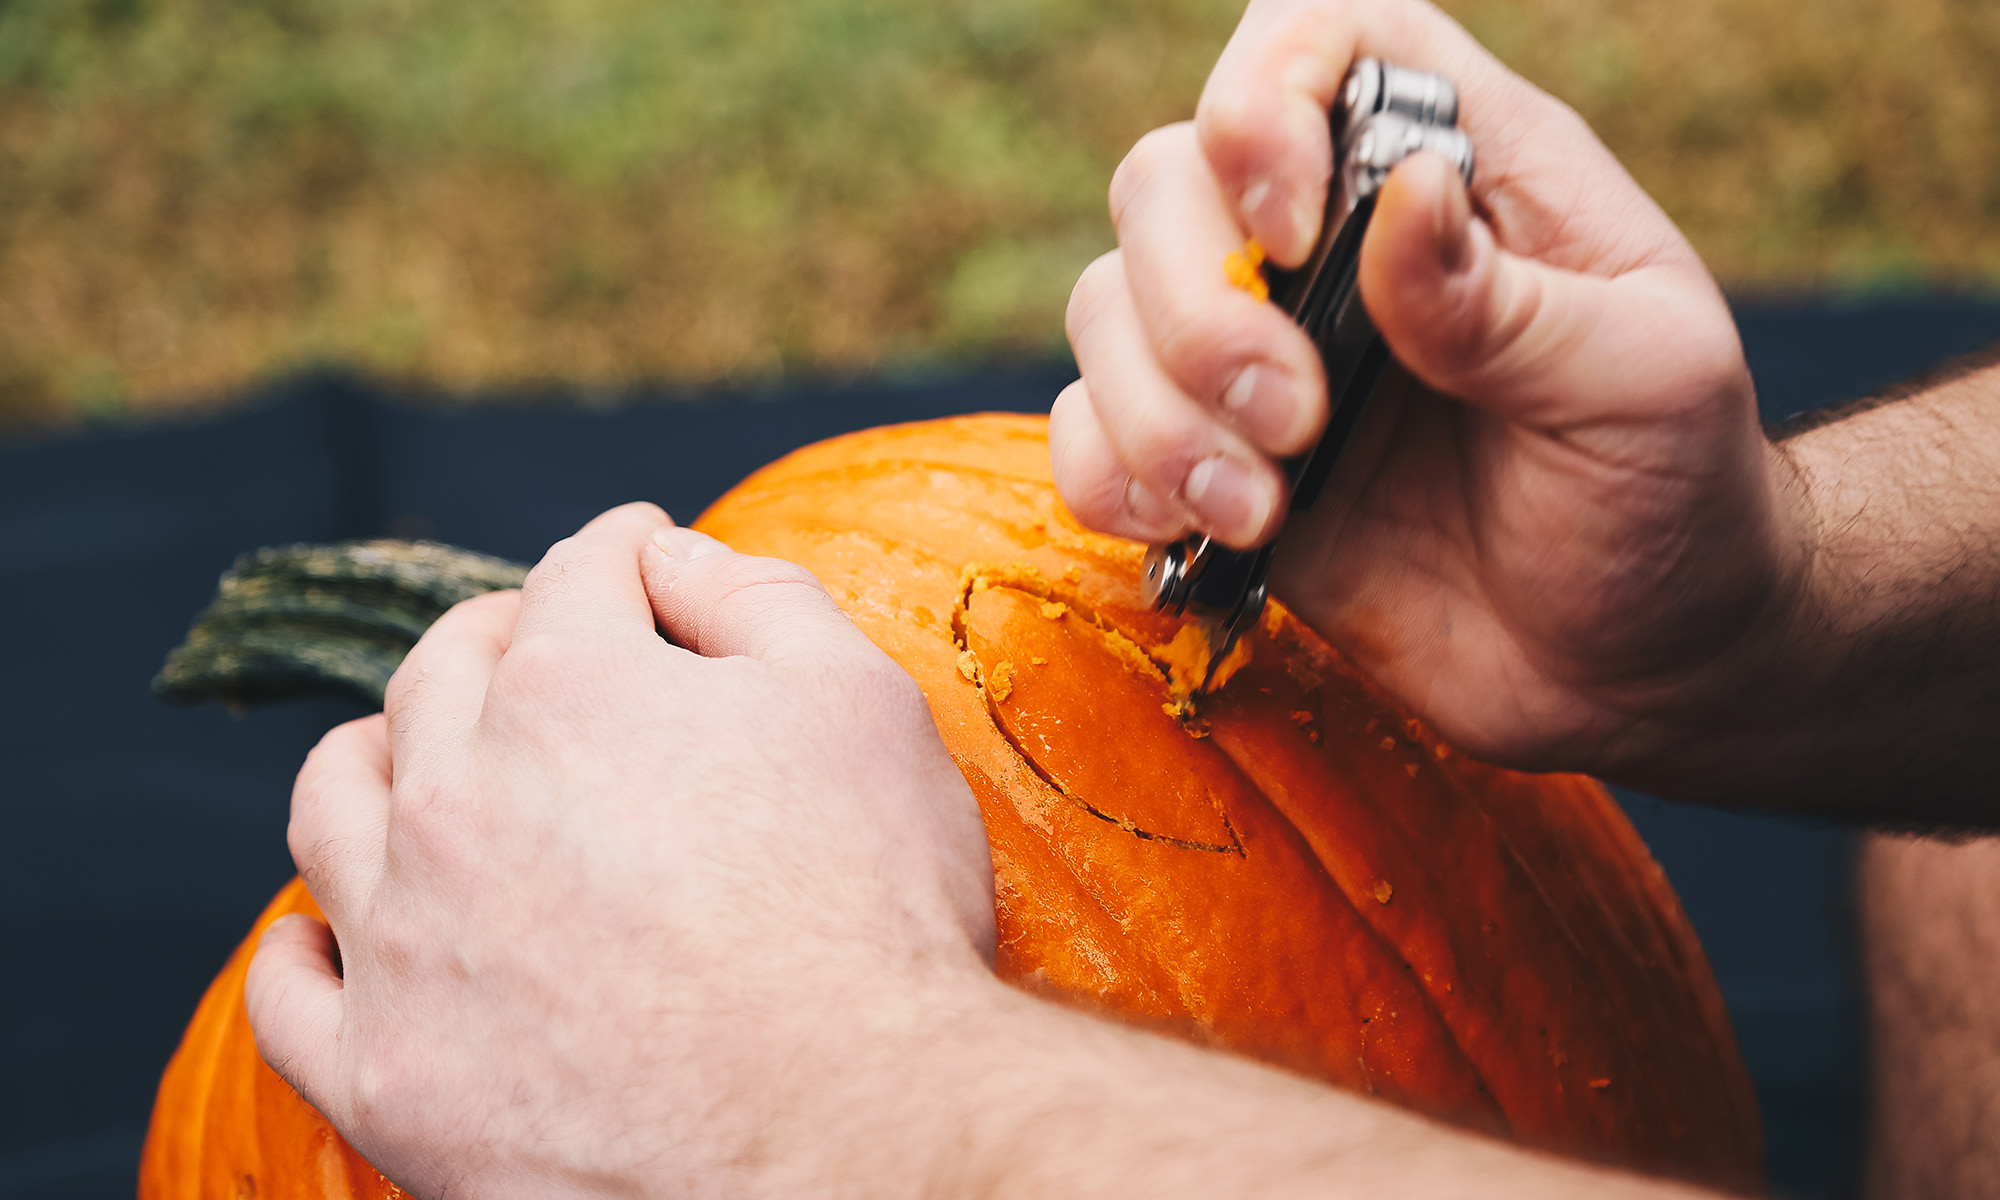
Carving with the Knife
The knife on your multitool is perfectly equipped for the job of carving straight lines, and will make easy work of areas like eyes and large mouths. The initial insertion of the knife will be a bit wide, so make sure to start on a large area of the design and work your way inward. The knife slides easily through pumpkin, making it the perfect choice as your main carving tool. Remember to carve slowly so as not to cut outside the design, and stick to long, straight cuts with the knife.
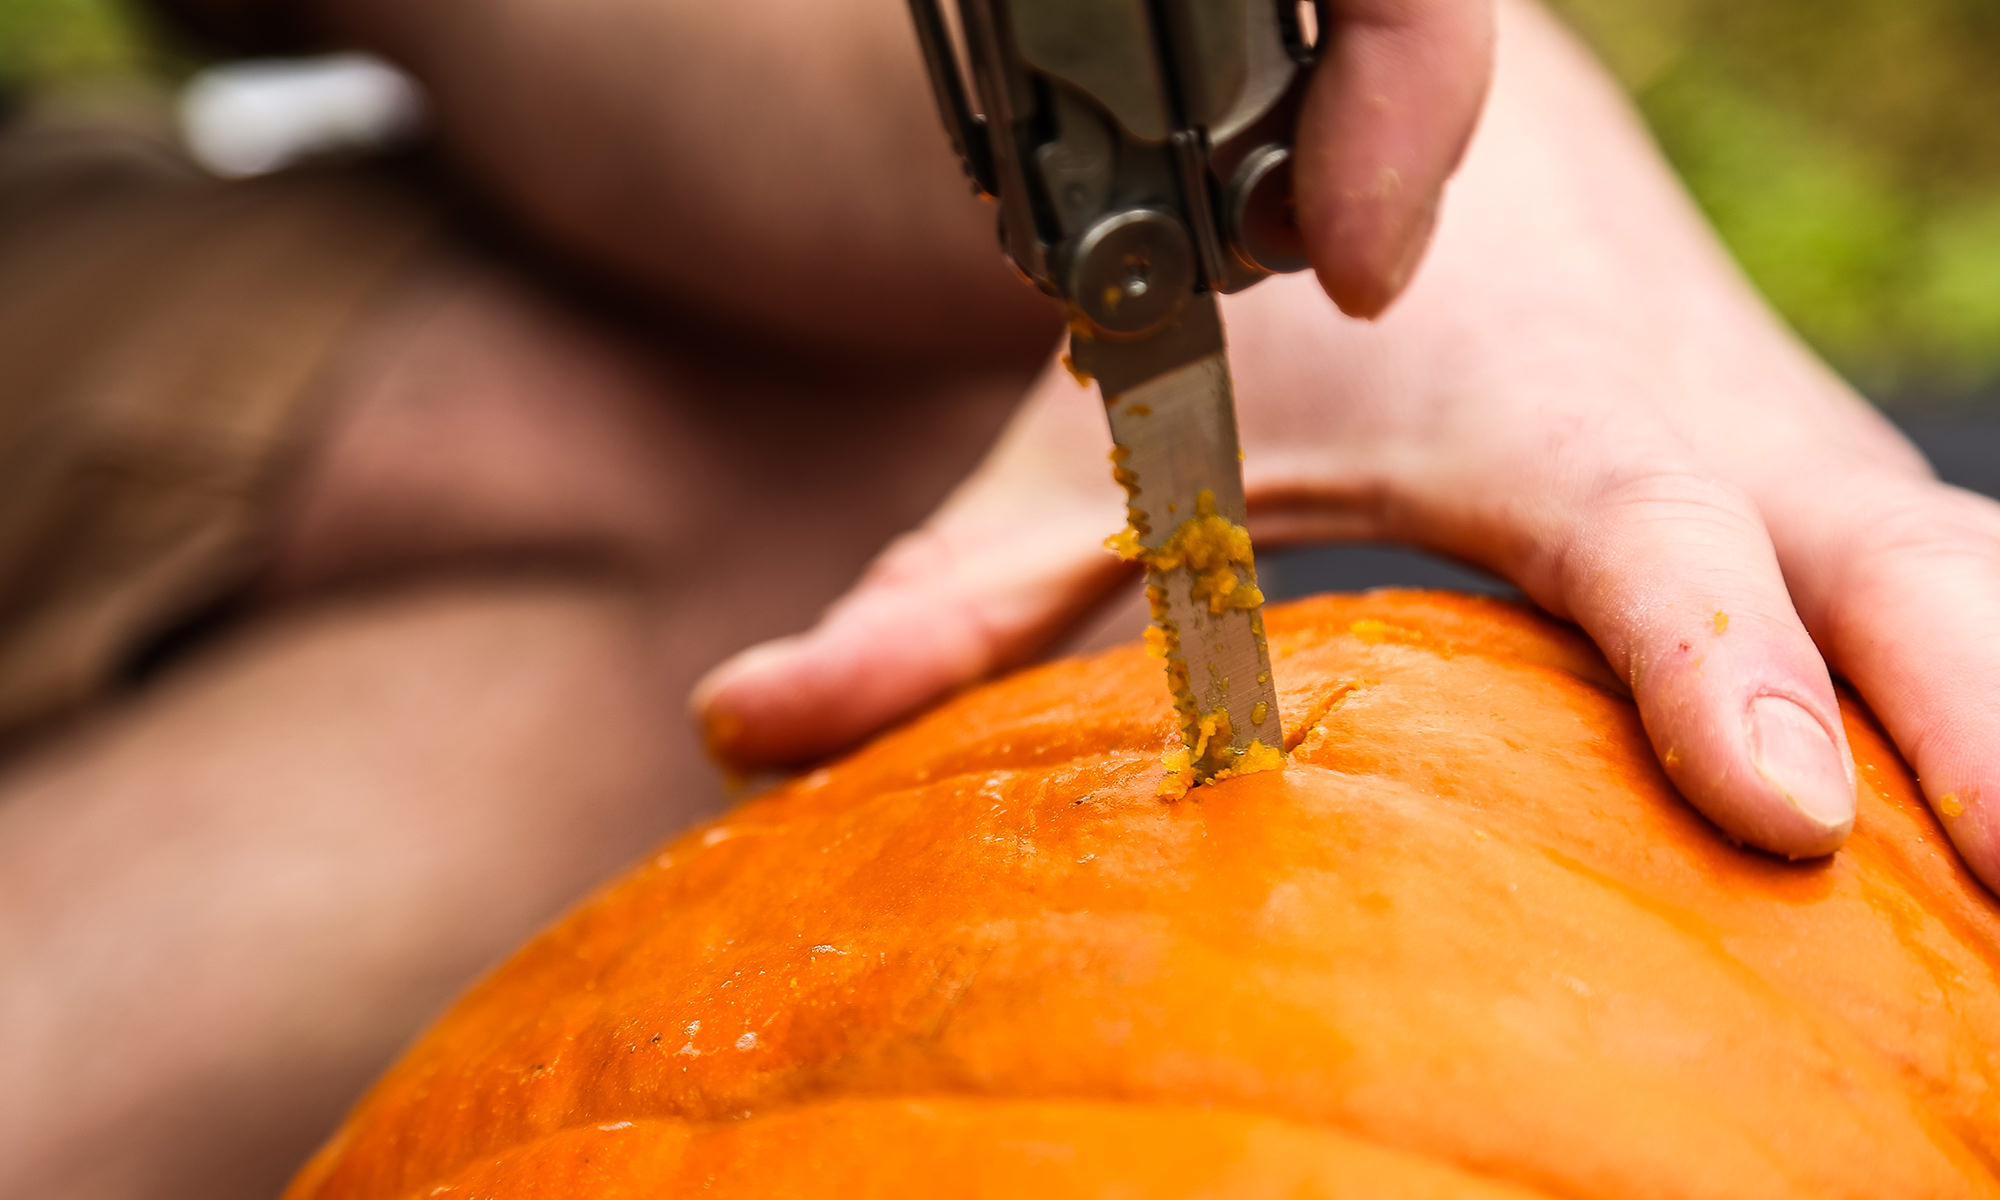
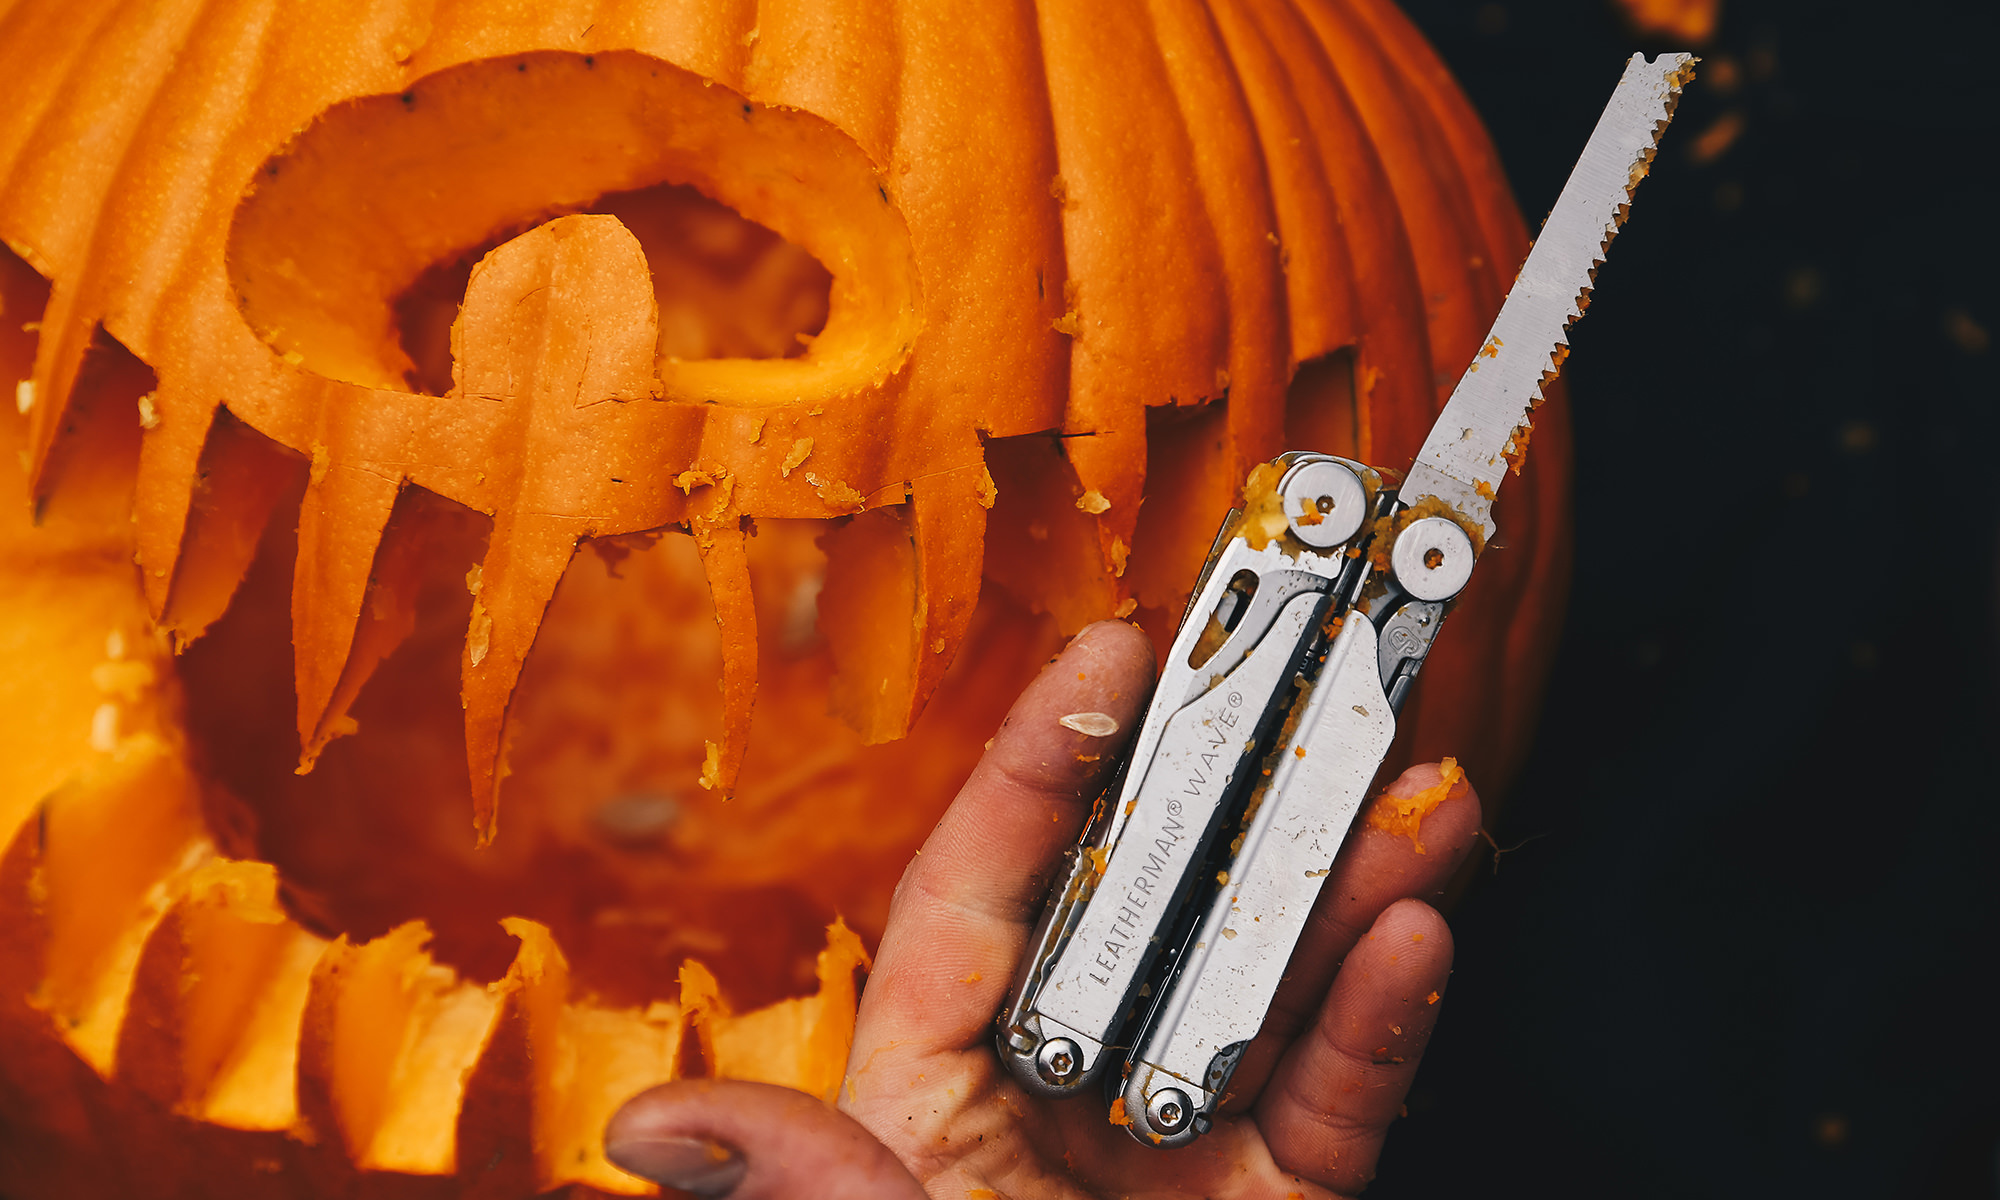
Carving with the Saw
When you move onto more difficult spots, with tight corners and thin sections that require more precise cutting, you’ll want to switch over to the saw. The saw of your multitool allows for more focused and methodical cutting, so you won’t accidentally plow through sections of the pumpkin that are outside of the original design.
Spots like small nose holes, tight corners on the edges of the mouth, and thin spaces in the eyes are where the saw really shines—especially when it comes to making circular shapes. But honestly, we won’t blame you if you did all the cutting with the saw: we did almost 95% of the work with the saw, using the knives to help poke little parts out around the spiky teeth.
Carving with the Serrated Knife
The serrated blade also works well for cutting larger areas, but should not be used to initially cut into the pumpkin as it could make your line thicker than you desire in that spot. Instead, stick to cutting out easy sections like the triangular eyes of the design, and avoid any small, intricate spots where the serrated blade would be too thick.
Cleaning Up with the File (and Knife)
Cutting out your design is easy, but you’ll want to touch up sections of your spooky face with the file to help smooth out the edges. Just as if you’re filing a small piece of wood, gently run the file inside the cut-out sections to help flatten them out for a crisper, cleaner look. The great thing about your Leatherman’s file is that it’s small enough to fit into tight spaces. The file is also great for pumpkins that are shaved, rather than carved. You can use it to file down special designs to create highlighted areas, or if you’d rather not cut into your pumpkin all the way through.
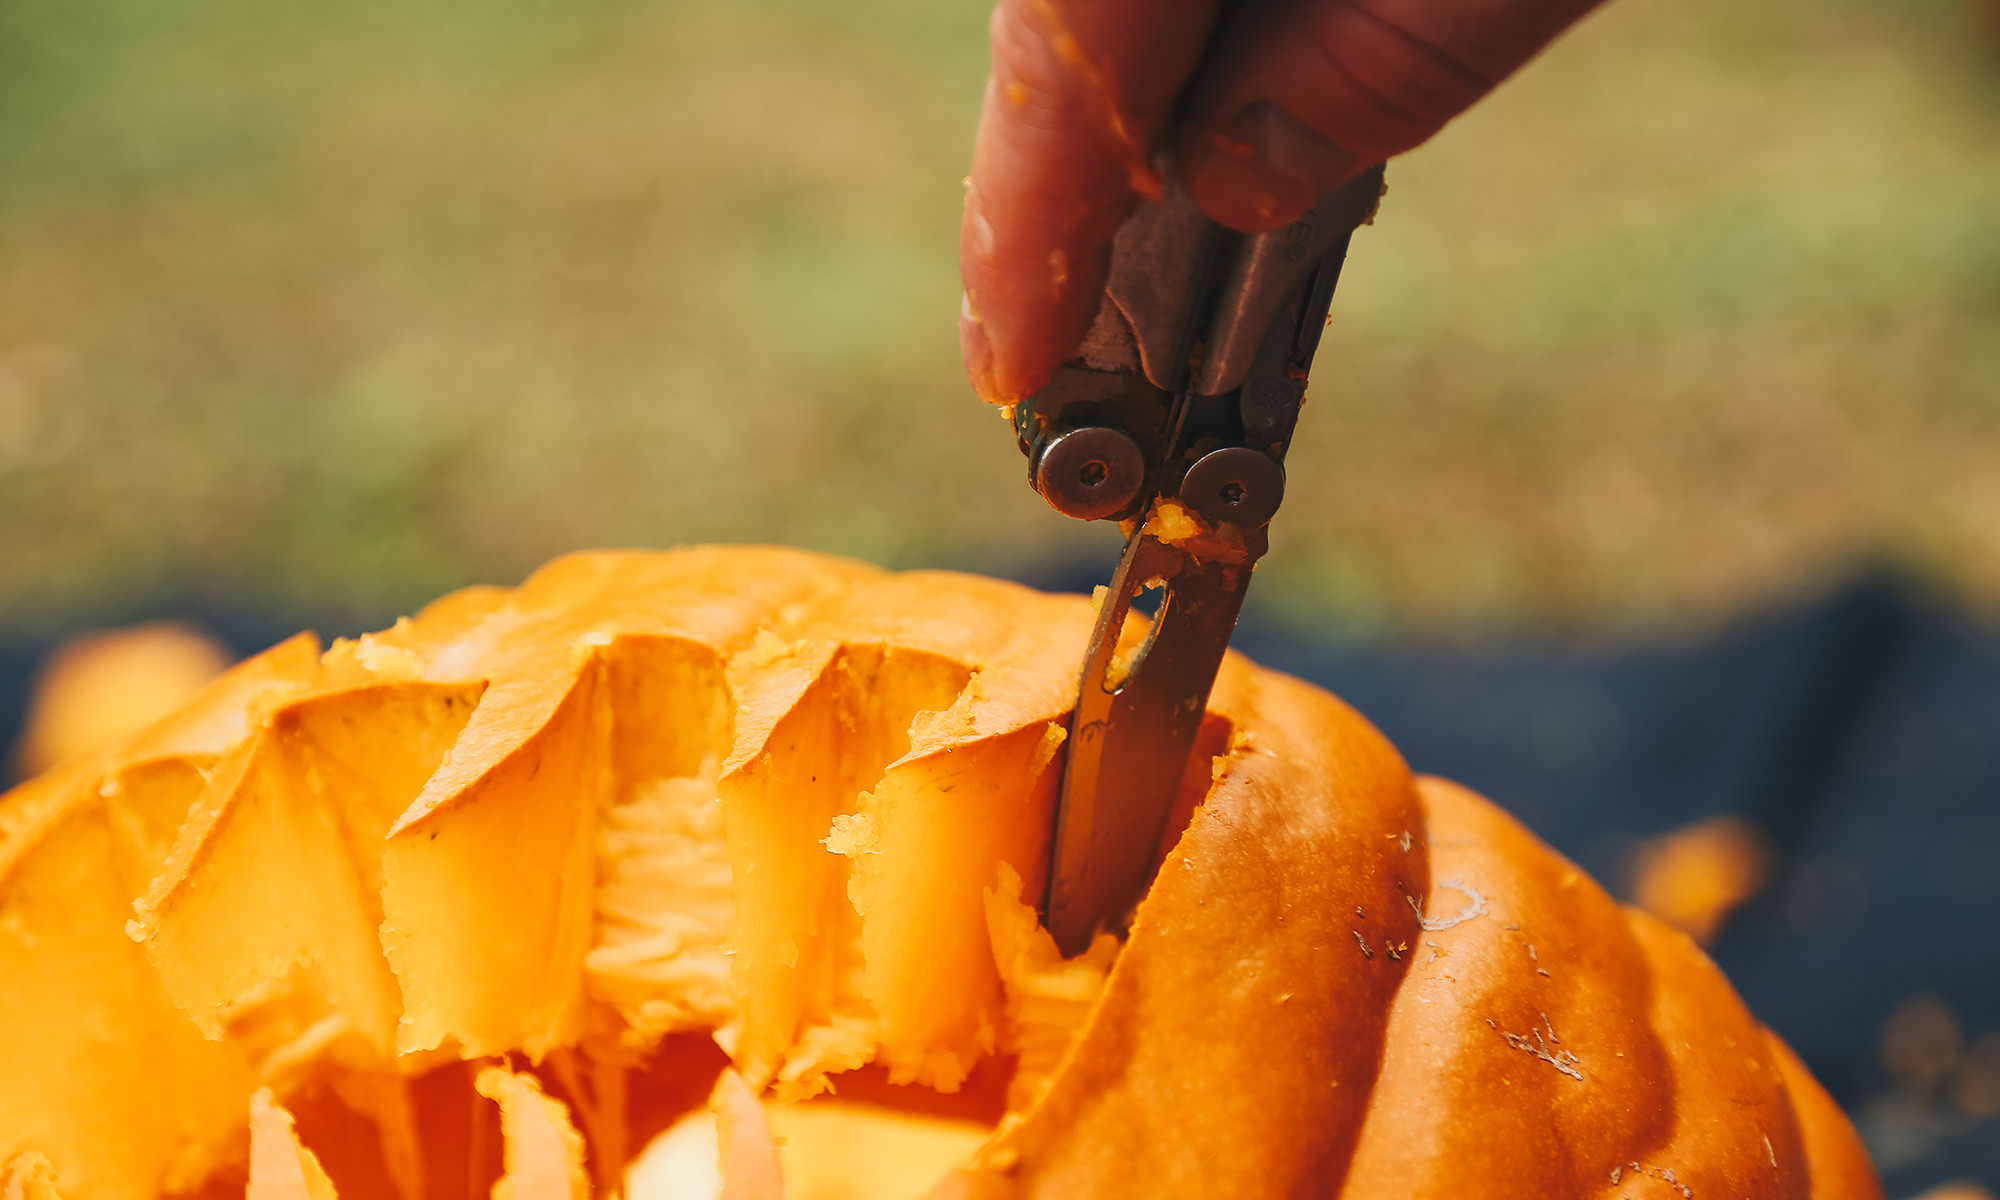
Removing the Top with the Serrated Blade
You can’t light up your pumpkin without an opening to put your candle in. For this task, we definitely want to use the serrated blade (the saw works as well, but the serrated blade is a bit easier). The bit driver can help you get started by outlining the area around the stem of the pumpkin where you want to cut out a hole. Then, the serrated blade provides a deep and sturdy cut that can move in a circular pattern, as opposed to the straight line you’ll likely get with the knife. Remember to always carve the top out at an angle, so it doesn’t fall in.
Enjoy your spooky pumpkin! Don’t forget to give your multi-tool a good cleaning after you’re done.
photos taken by Connor Cockrell