Robots are a fun and surprisingly simple costume to make if you have the right tool: a Leatherman.
All you really need is cardboard, tape, and your multi-tool to get started—the specifics of the costume, such as color and flourishes, are up to you! Throw in some paint, LEDs, and little metal pieces, and you’re well on your way to becoming the talk of the room.
The Troll Bot
For anyone who uses the Internet for…oh, just about everything these days…Troll Bots are the ultimate spook. In the past, a bot was software and a troll was a person. Today, using open-source software and some inexpensive cloud services, modern era AI troll/bot combinations are regularly released like armies across the Internet to sway your opinion or persuade you to vote a particular way.
Every time you log on to social sites, you’re bound to run into a Troll Bot. Talk about scary! Which makes the Troll Bot the perfect Halloween costume this year—fun to build and show up at your favorite party scene, as well as politically and socially on point.
Getting Started
We’ll show you how to build (but not deploy) a simple Troll Bot helmet with easy instructions. Follow this step-by-step guide to build your basic Troll Bot and modify with your own personal flourishes. Or dig through your electronics recycle bin and add whatever suits your fancy.
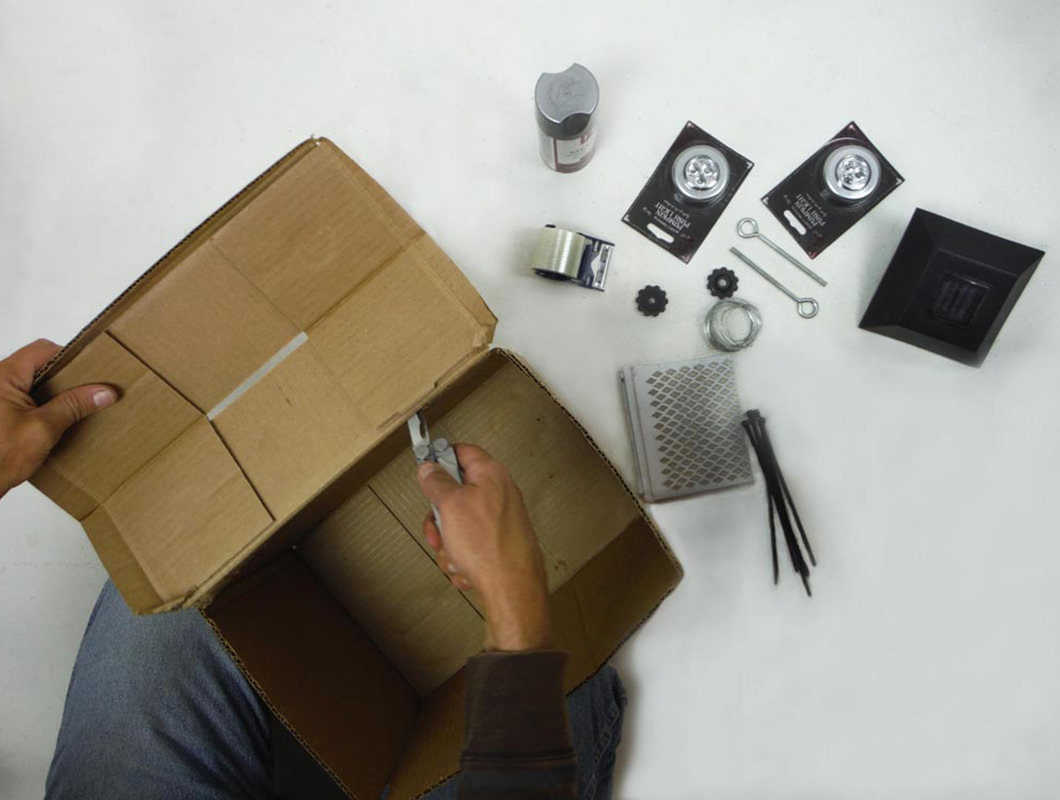
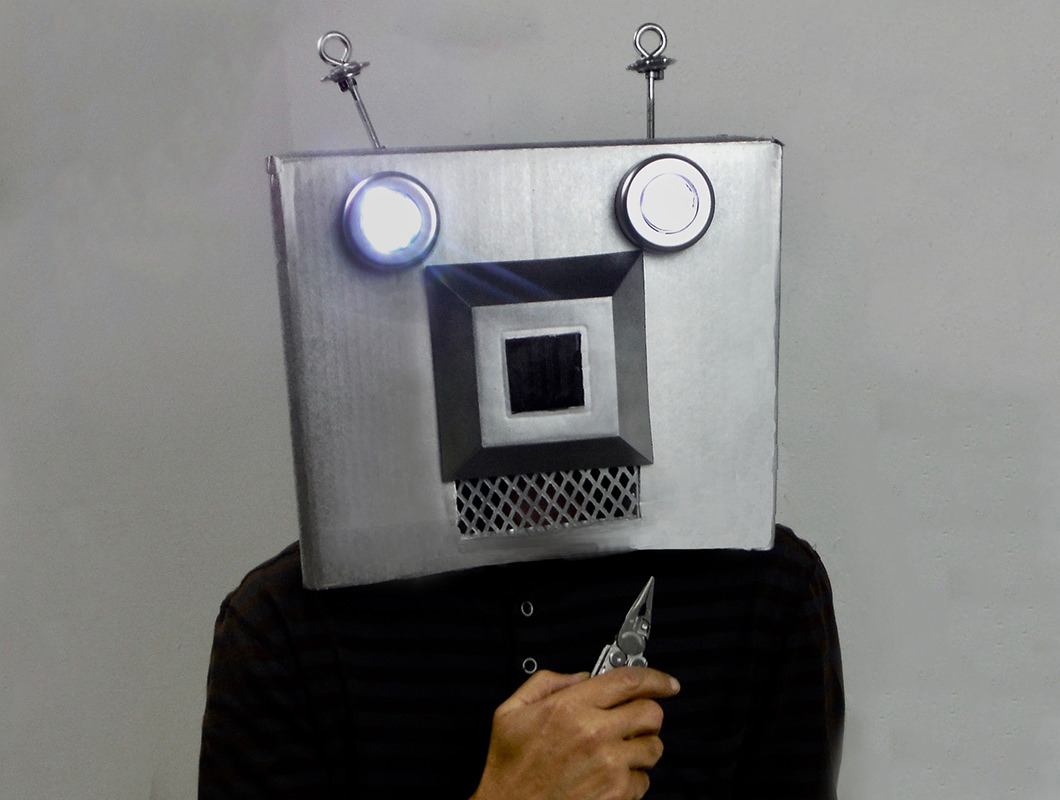
Step 1: Gather your supplies.
– Cardboard box
– Roll of packaging tape
– Zip ties
– Can of metal-colored spray paint
– Misc gear parts (we used worn derailleur pulleys—stop by a bike shop and ask for their discards)
– Solar yard light for the nose, functionally working or not (or something that resembles a nose, if you even want your bot to sniff)
– Gutter cover plastic mesh for the mouth
– Eye bolts
– LED pumpkin lights/AAA batteries (Dollar store)
– Leatherman Wave Tool
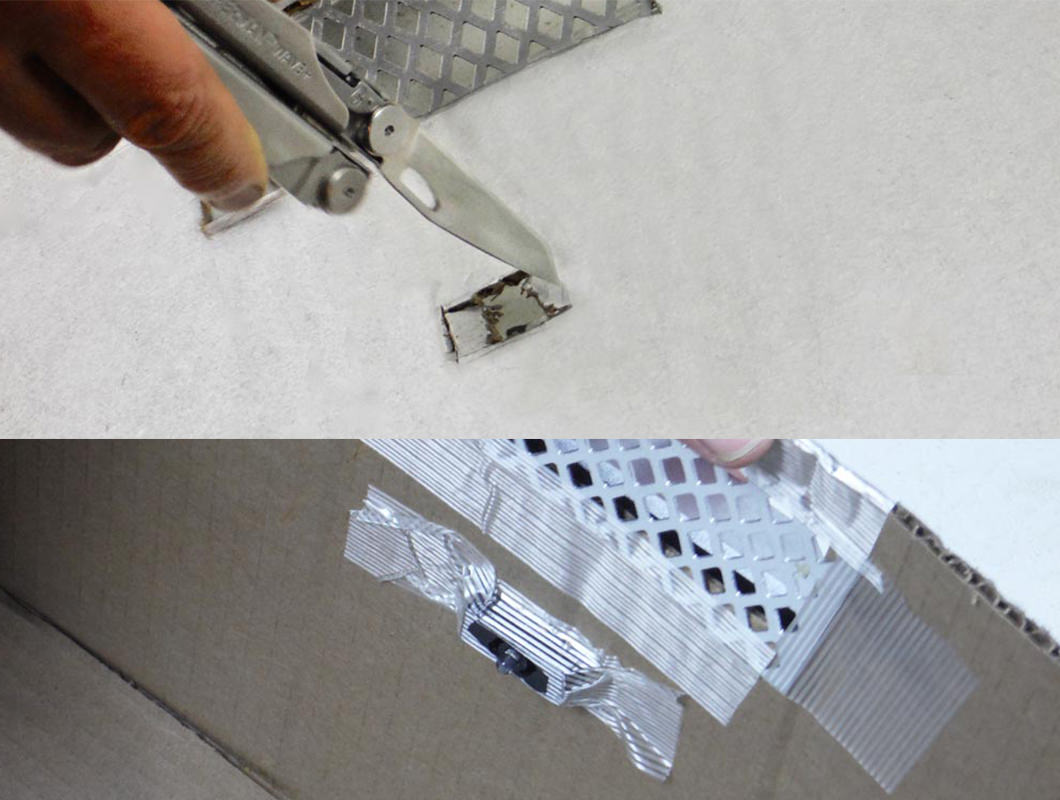
Step 2: Trim the box using the knife on your Leatherman Wave.
This is where some preplanning would come in handy—do you want the costume to have a neck? Do you want to have eyeholes to see out of? We went with a simple helmet style in this guide. The goal here is to prep all the parts you’ll be using for the next step: painting!
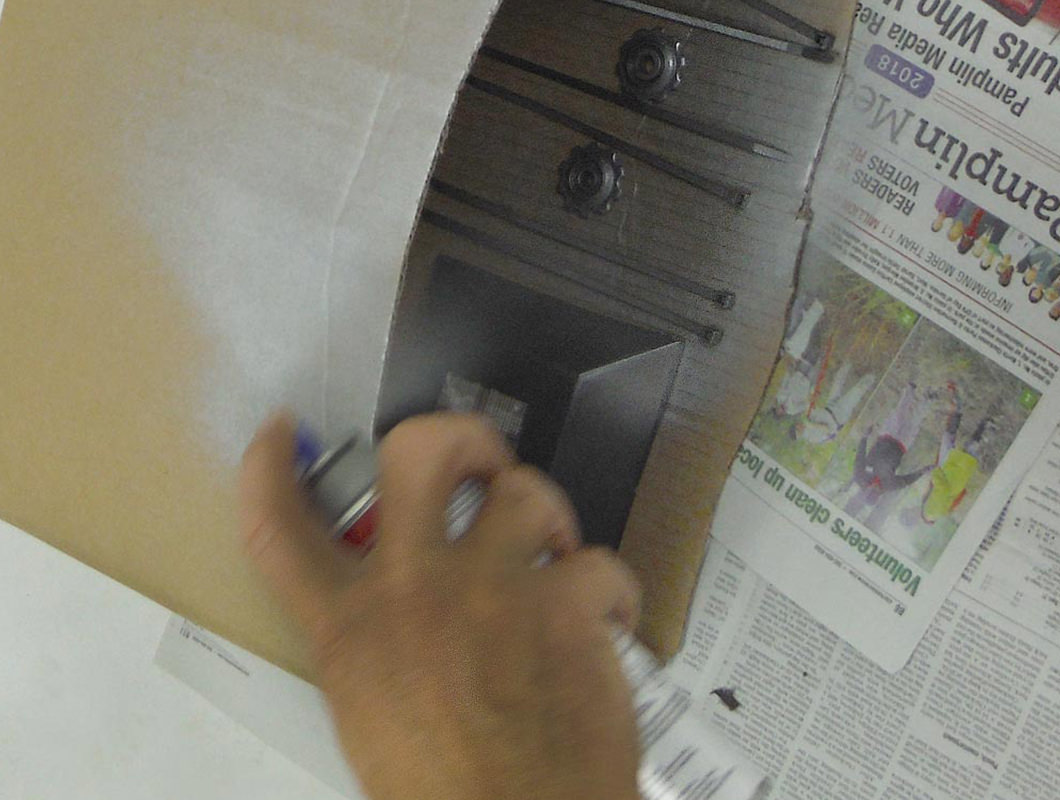
Step 3: Painting
Use the knife blade or scissors to cut some tape to cover areas you want to remain free of spray paint.
Place pieces you want to paint inside the box and spray, then spray the box (in a well-ventilated area).
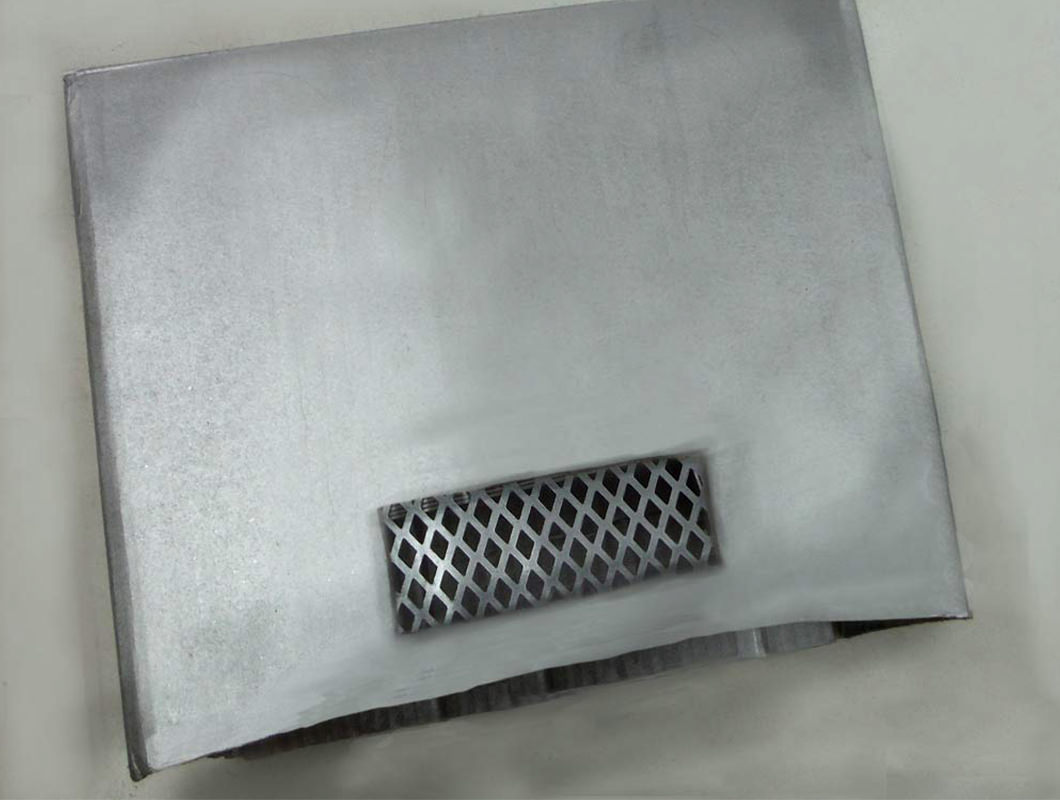
Step 4: The Mouth
Cut spray painted gutter screen for the mouthpiece. Then cut a hole in the box for the mouth. Place tape on mouthpiece section and attach to the backside of the cutout section, via inside of the box.
Step 5: The Nose
Cut a hole for the nosepiece. Insert the nosepiece and tape on inside of the box.
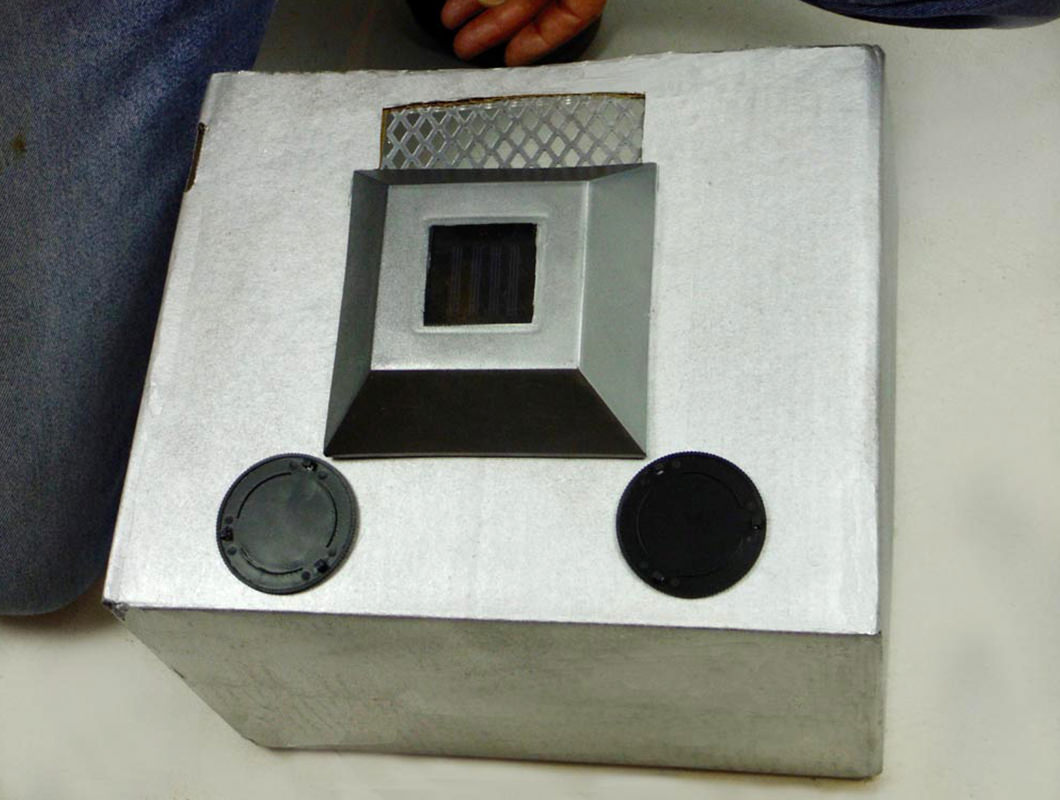
Step 6: The Eyes
Place batteries in the round LED lights, and remove the sticky tape on the back. Place above the nose.
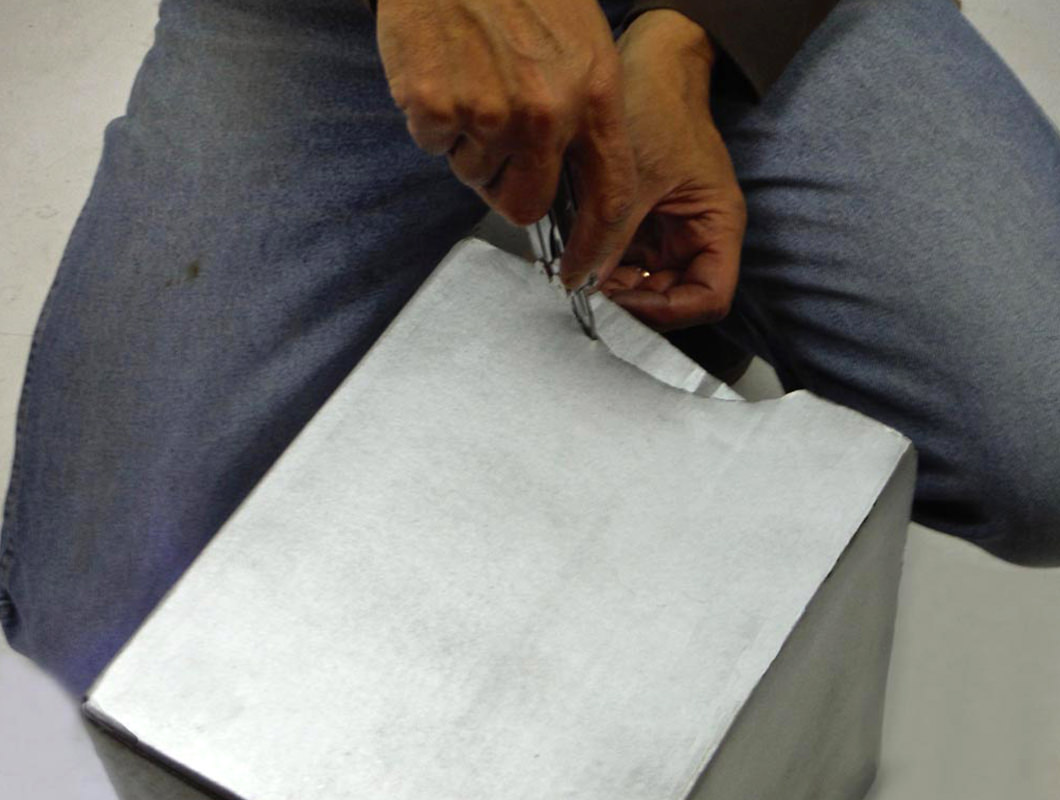
Step 7: Making it Wearable
If you’re wanting to just wear this as a helmet and remove frequently, the easiest method is to cut out a half moon on each side to accommodate your shoulders.
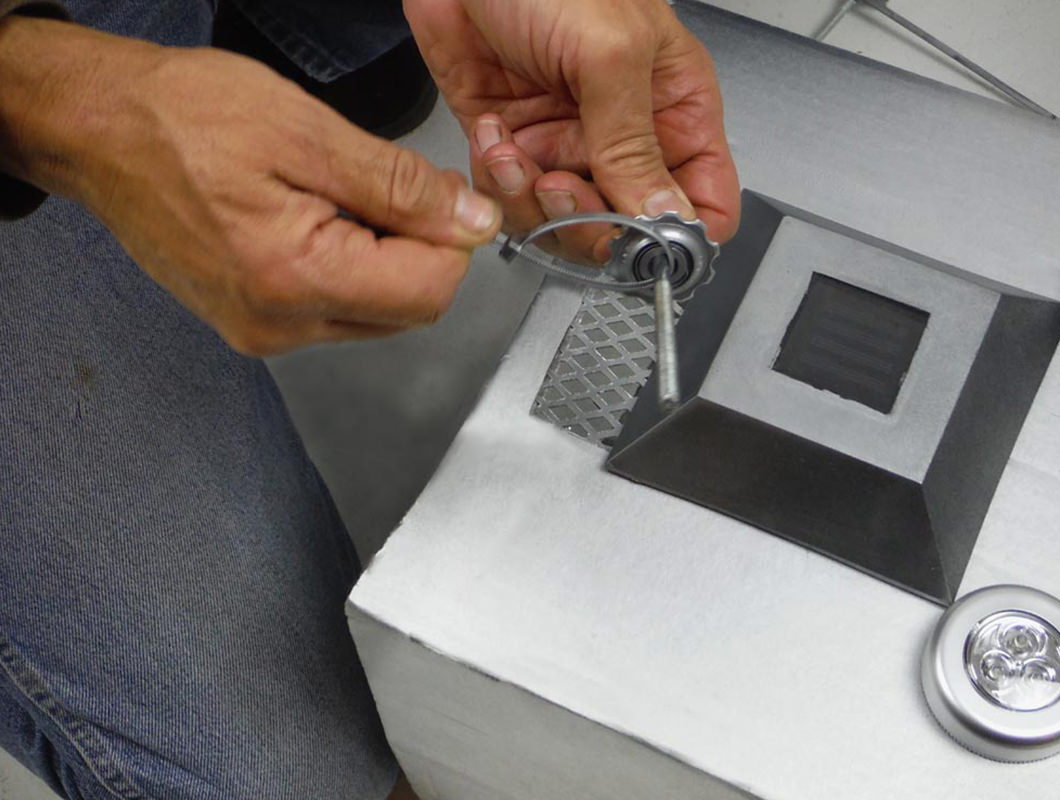
Step 8: Robotic Flourishes
Slide the derailleur wheels on the eye bolts. Secure with a Zip tie. Cut excess zip tie using your Leatherman’s knife or wire cutters.
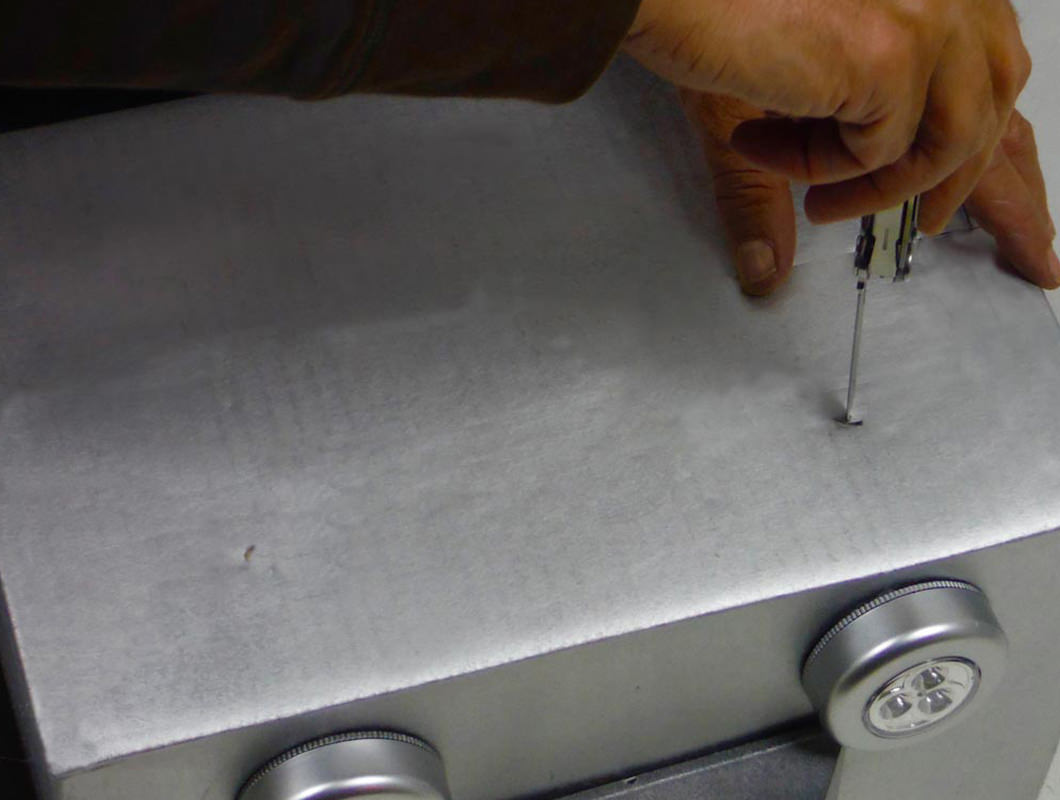
Insert into the top of the box and affix the eye bolt to the box using either tape or and zip tie to secure inside the box; or use a pair of nuts to clamp it on to the box (one outside on top of the box, and one inside underneath the box).
Voila! Simple bot head costume complete. Feel free to add your own finishing touches.