Painting typically takes the top place for most popular homeowner DIY tip, but installing baseboard moldings to a room can add even more appeal.
Sure, it requires a few more fixer-upper skills than painting—not saying that painting is necessarily easy, you can definitely mess up a paint job—but installing baseboard molding will tax your inner handy man just a little further.
We sat down with Living In Place co-founder Erik Listou to gain some insights on these DIY tips to help make the installation of baseboard moldings even easier.
Adhere with either glue or caulk instead of nails
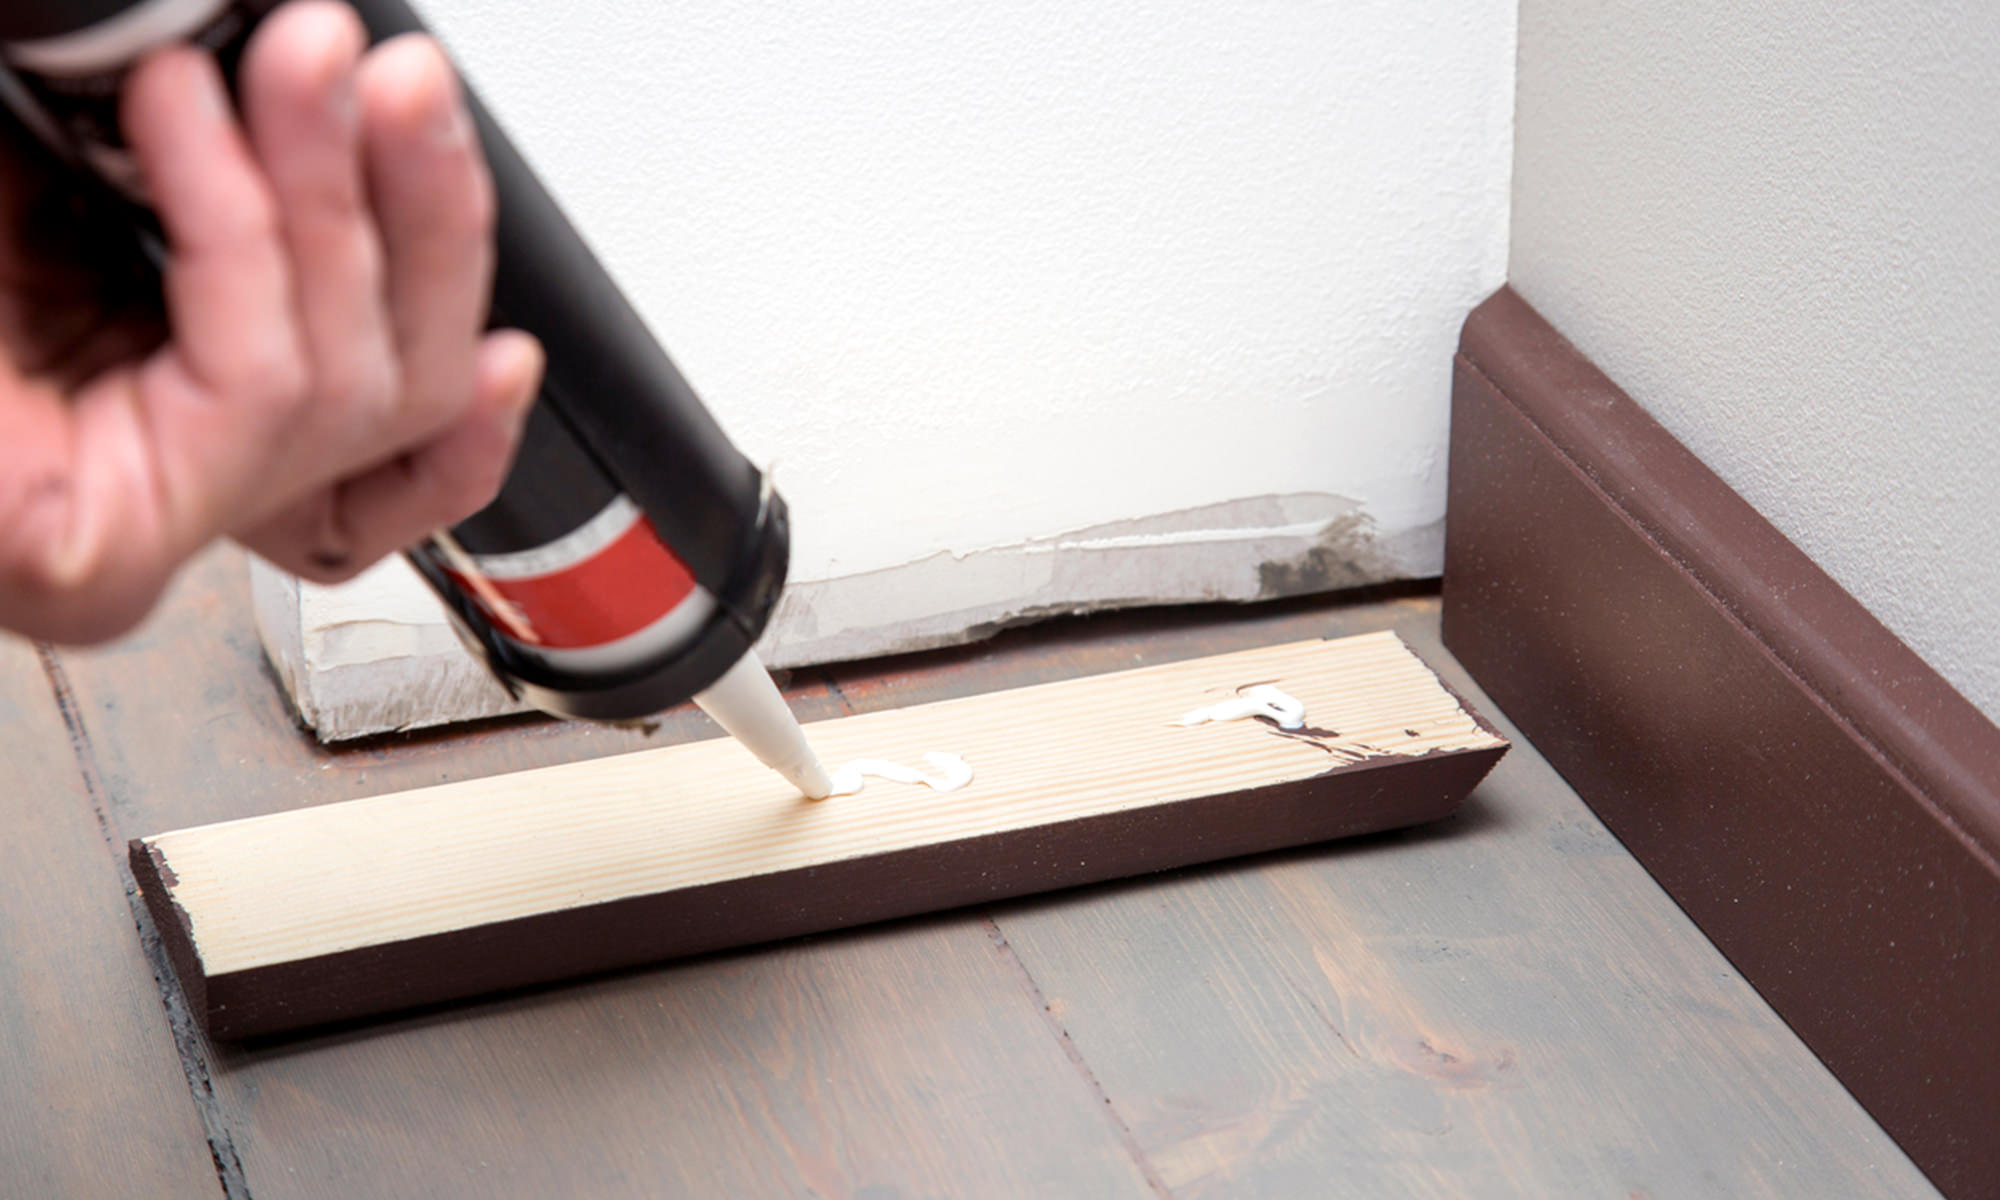 Using glue or caulk to adhere your new baseboards makes the job a lot easier. First of all, it doesn’t require a nail gun and compressor, nor the skills required to use a nail gun. Trim or finishing nails have to be counterset to look good, and that can be tricky to get right as well. Almost any kind of wood glue or general adhesive caulk is perfect for sealing your new baseboard molding into place.
Yes, it can be a little messy, but caulk cleans up easy with paper towels and water. Caulk also helps seal the floor and fills any gaps where the flooring meets the walls.
Use outside corner blocks to eliminate cutting 45-degree mitered corners
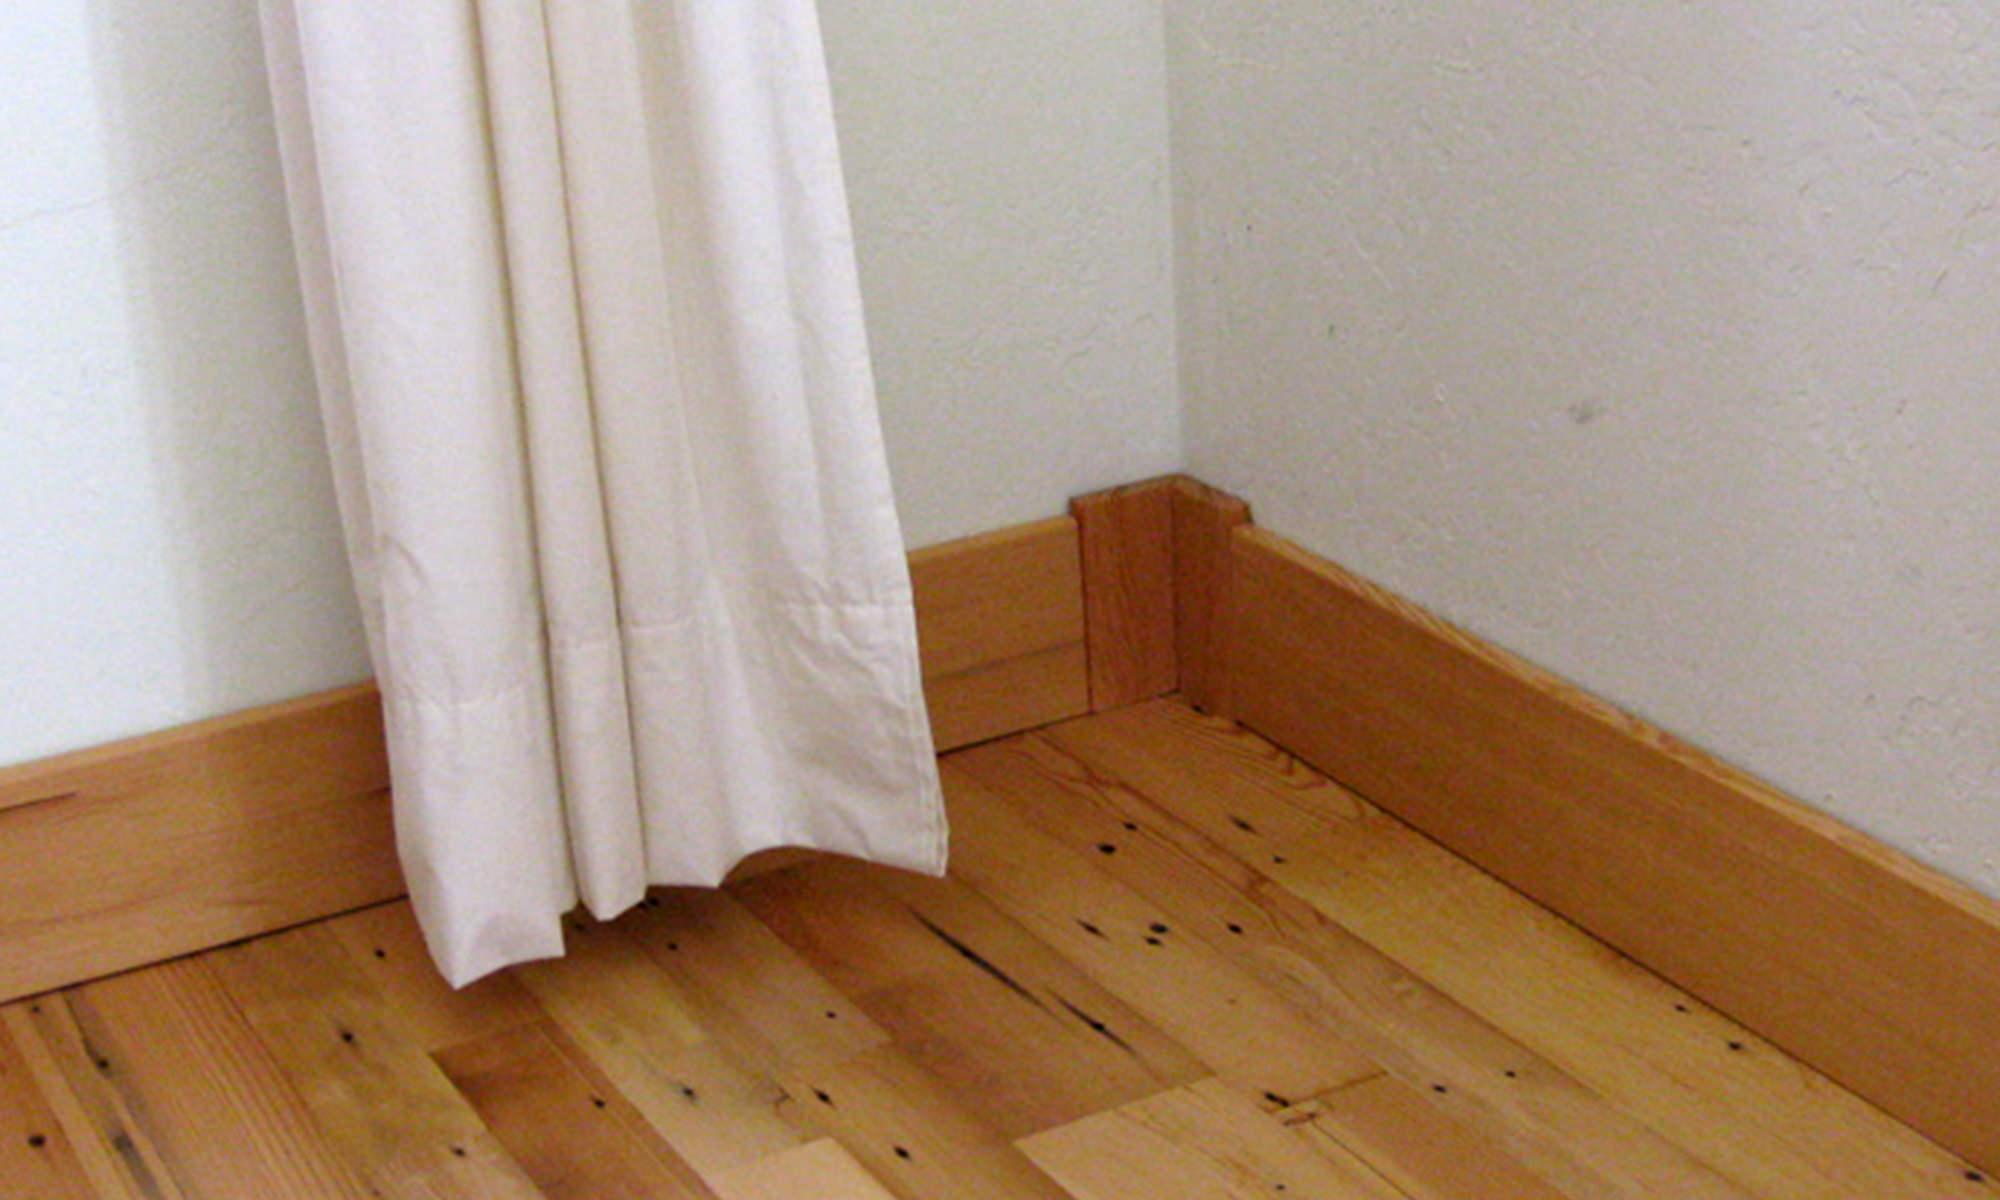 Again, this DIY molding tip eliminates an expensive tool that you can really hurt yourself with. And you can also really mess up some boards trying to cut perfect 45-degree corners. Using plain or decorative corner blocks, all you have to do is cut straight edges and fit them together.
As long as you can use a tape measure (measure thrice), you can get board lengths right and cut them with a chop saw or skill saw. So yes you’re still using a saw, but straight, non-directional cuts are way easier than miter cuts. Corner blocks work well on trim around windows and doors as well.
Use tall molding
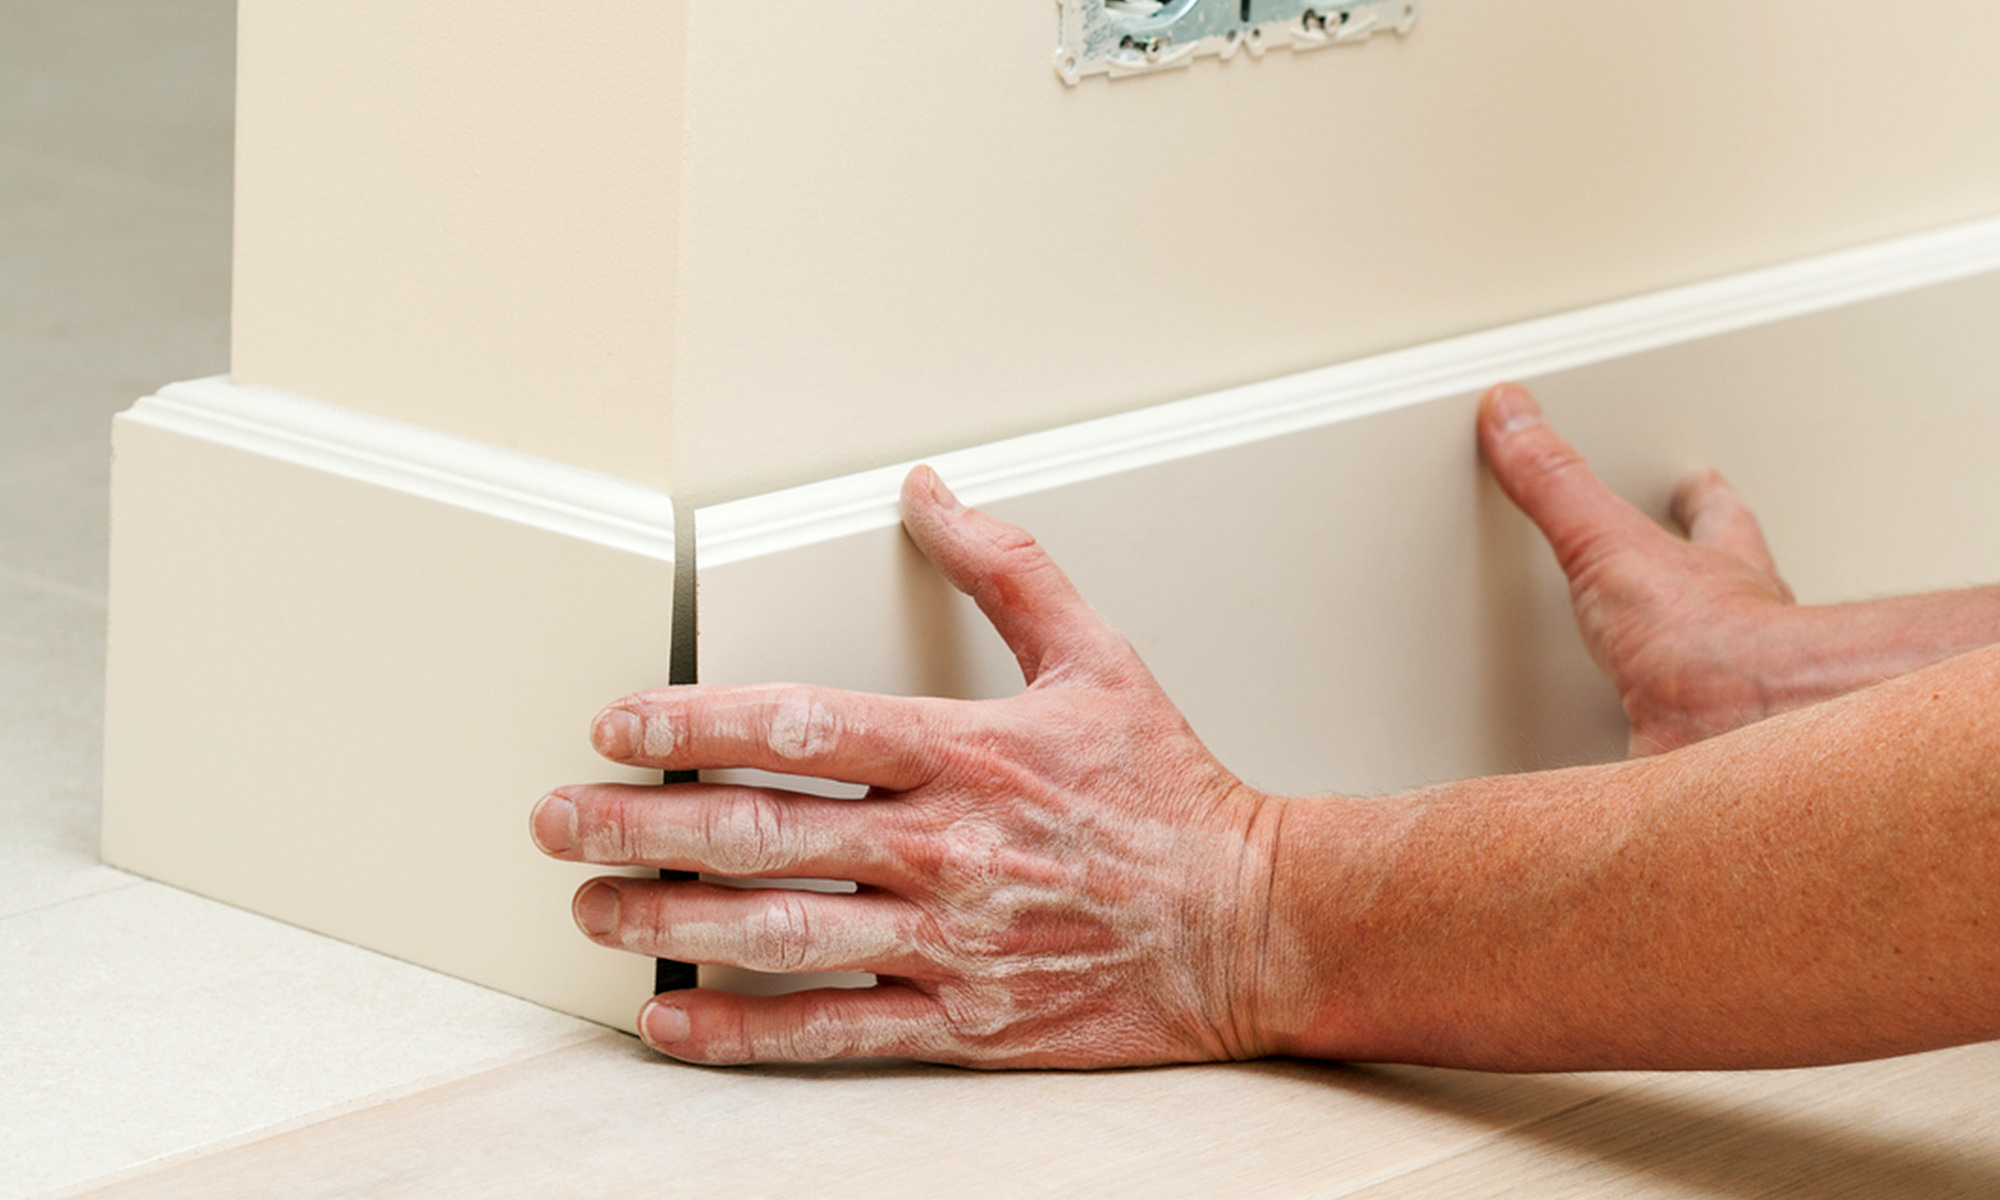 Spend the extra money on taller baseboard molding. Make sure it’s at least as tall or taller than your pre-existing molding. Tall baseboard molding has many benefits: it will hide any wall damage from the previous molding tear-out; it helps hide sloppy paint jobs; and it makes the room look bigger.
More ornate tall baseboard molding will make any room look grander, so consider this tip for smaller rooms in your home (which will also be cheaper than doing your dining room, for example, because tall moldings can be fairly expensive).
Once you’ve finished installing your new baseboards, take your new DIY molding project to the next level by adding in crown molding around the ceiling and finish off the room in a big way.