Fly rods break. It happens. Car doors, heavy bead heads, tree branches, clumsy boots, dogs running around boats, etc.
If you are fishing hard, there’s a good chance you will bust a rod and be stranded in the field. In some instances, the rod break beyond repair and you either have a spare handy or call it a day. Major fractures, especially near the butt are enough to permanently put your rod to rest. Breaks near the tip and damage to the guides, however, are candidates for simple repairs in the field or at home.
I keep a small repair kit in my car and have used it a handful of times to save the day. One particular guide repair job has actually survived the past 6 years with regular use, saving me the postage required to use the manufacturer’s warranty.
Repair Kit:
- Thread (rod thread, fly tying thread or dental floss will suffice)
- Hot glue gun stick
- Super glue
- Lighter
- Small square sandpaper. Any grit or scrap will work.
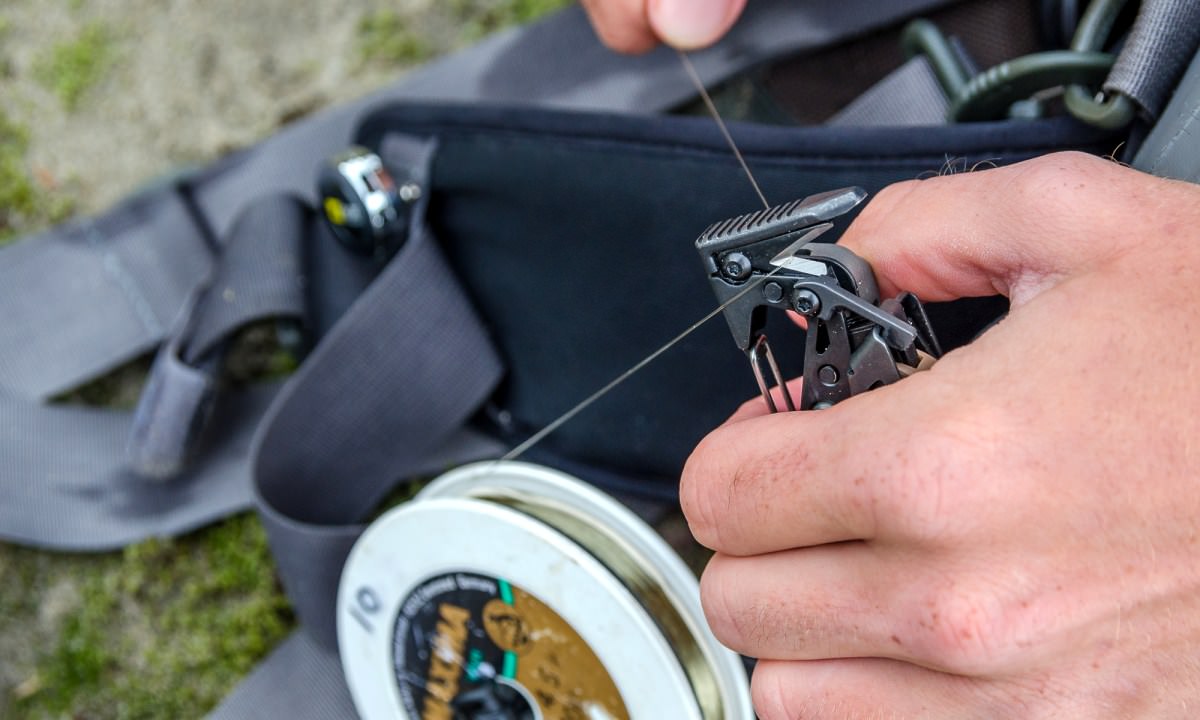
- Leatherman Multi-Tool – You will need the pliers and knife so most Leatherman models are effective
Inspect the Damage
Start with the butt and do a full inspection until you hit the tip. There is no point in fixing a rod that’s broken in multiple places. If the blank is broken at any point below the tip, repair is very unlikely. Modern rods will fracture and splinter while losing the flex and rigidity that make them functional. Blanks broken within a few inches of the tip can be capped to retain their physical functionality.
Damage to the reel seat and guides is also a common woe. Guides will come loose from the wraps and disconnect from the rod. Typically, one guide foot will come loose while the other remains intact. This is an easy fix on most rods. Reel seats will sometime come loose when the epoxy breaks down. You can reseat them by sanding off the old epoxy and applying a new layer at home or you can use super glue for temporary field repairs.
Fixing a Broken Tip
Use the cutting section on your multi-tool pliers to clip the very tip of the rod blank for a clean break. In most cases, you are just removing splinters of graphite from the tip. Grip the fully severed tip top guide with your multi-tool and heat the metal with a lighter to soften the original glue. Pull any remaining rod blank free from the guide.
Use the knife on your Leatherman to shave thin pieces off the glue stick. A sharp blade helps create thin shavings that easily fit into the small female end of the tip piece. Pack the shavings into the tip-top guide. Grip the guide with your multi-tool pliers and heat the metal to soften the glue. Place the guide back on the tip of your rod and align it with the other guides. If the diameter has changed enough to prevent the original tip from fitting, you may need to purchase a new tip in a larger size. You can also keep a few spare tips in your repair kit if desired.
Fixing a Broken Guide
Take a close look at the broken guide. If one guide foot has popped loose, look for a clean hole where it will re-insert. The original wraps may still be held by the original finish. Simply re-insert the foot and apply a few drops of superglue to the opening. Wait until it dries and you are back in business.
If the wraps have come loose or an easy repair is not possible, get out your thread and glue. In a perfect world, you would use a razor to remove the original wraps and sandpaper to clean the old glue. In the field, you can wrap over the original finish for a temporary repair and do a full re-wrap at home.
Press the guide foot against the blank in the original position. Make 2-4 wraps, overlapping the thread to lock it in place. Continue wrapping until the foot is completely covered and tight to the blank. Make a loose wrap to create a loop, followed by several firm wraps. Pass the tag end back through the loop and pull tight to secure the wraps. Coat with a thin layer of super glue to hold everything together. Let it dry for a few minutes while manually turning and spinning the blank to evenly distribute the glue.
Get back to fishing!