With a Leatherman multitool, it’s fun and easy to build a DIY digital antenna optimized for 21st century television.
A good digital antenna opens up a whole world of great but little-known over-the-air programming that could include Latin American futbol, old movies, and even reruns of game shows. Here’s how you can make your own.
Gather the things you’ll need.
- (1) 32-inch long 1" X 4" pine board (cut to length using the saw tool)
- (1) 8-inch long 1" x 4" pine board
- (1) 132-inch long piece of bare 12-gauge copper wire (the ears)
- (1) 68-inch long piece of 12-gauge copper wire (phasing bars
- (8) #8 round head wood screws, ½-inch long, and fender washers
- (2) # 8 flat head wood screws, 1½-inch long
- (1) 75 to 300 ohm impedance matching transformer
- Electrical tape
 Cut the board to 32 inches long with the saw on your multitool.
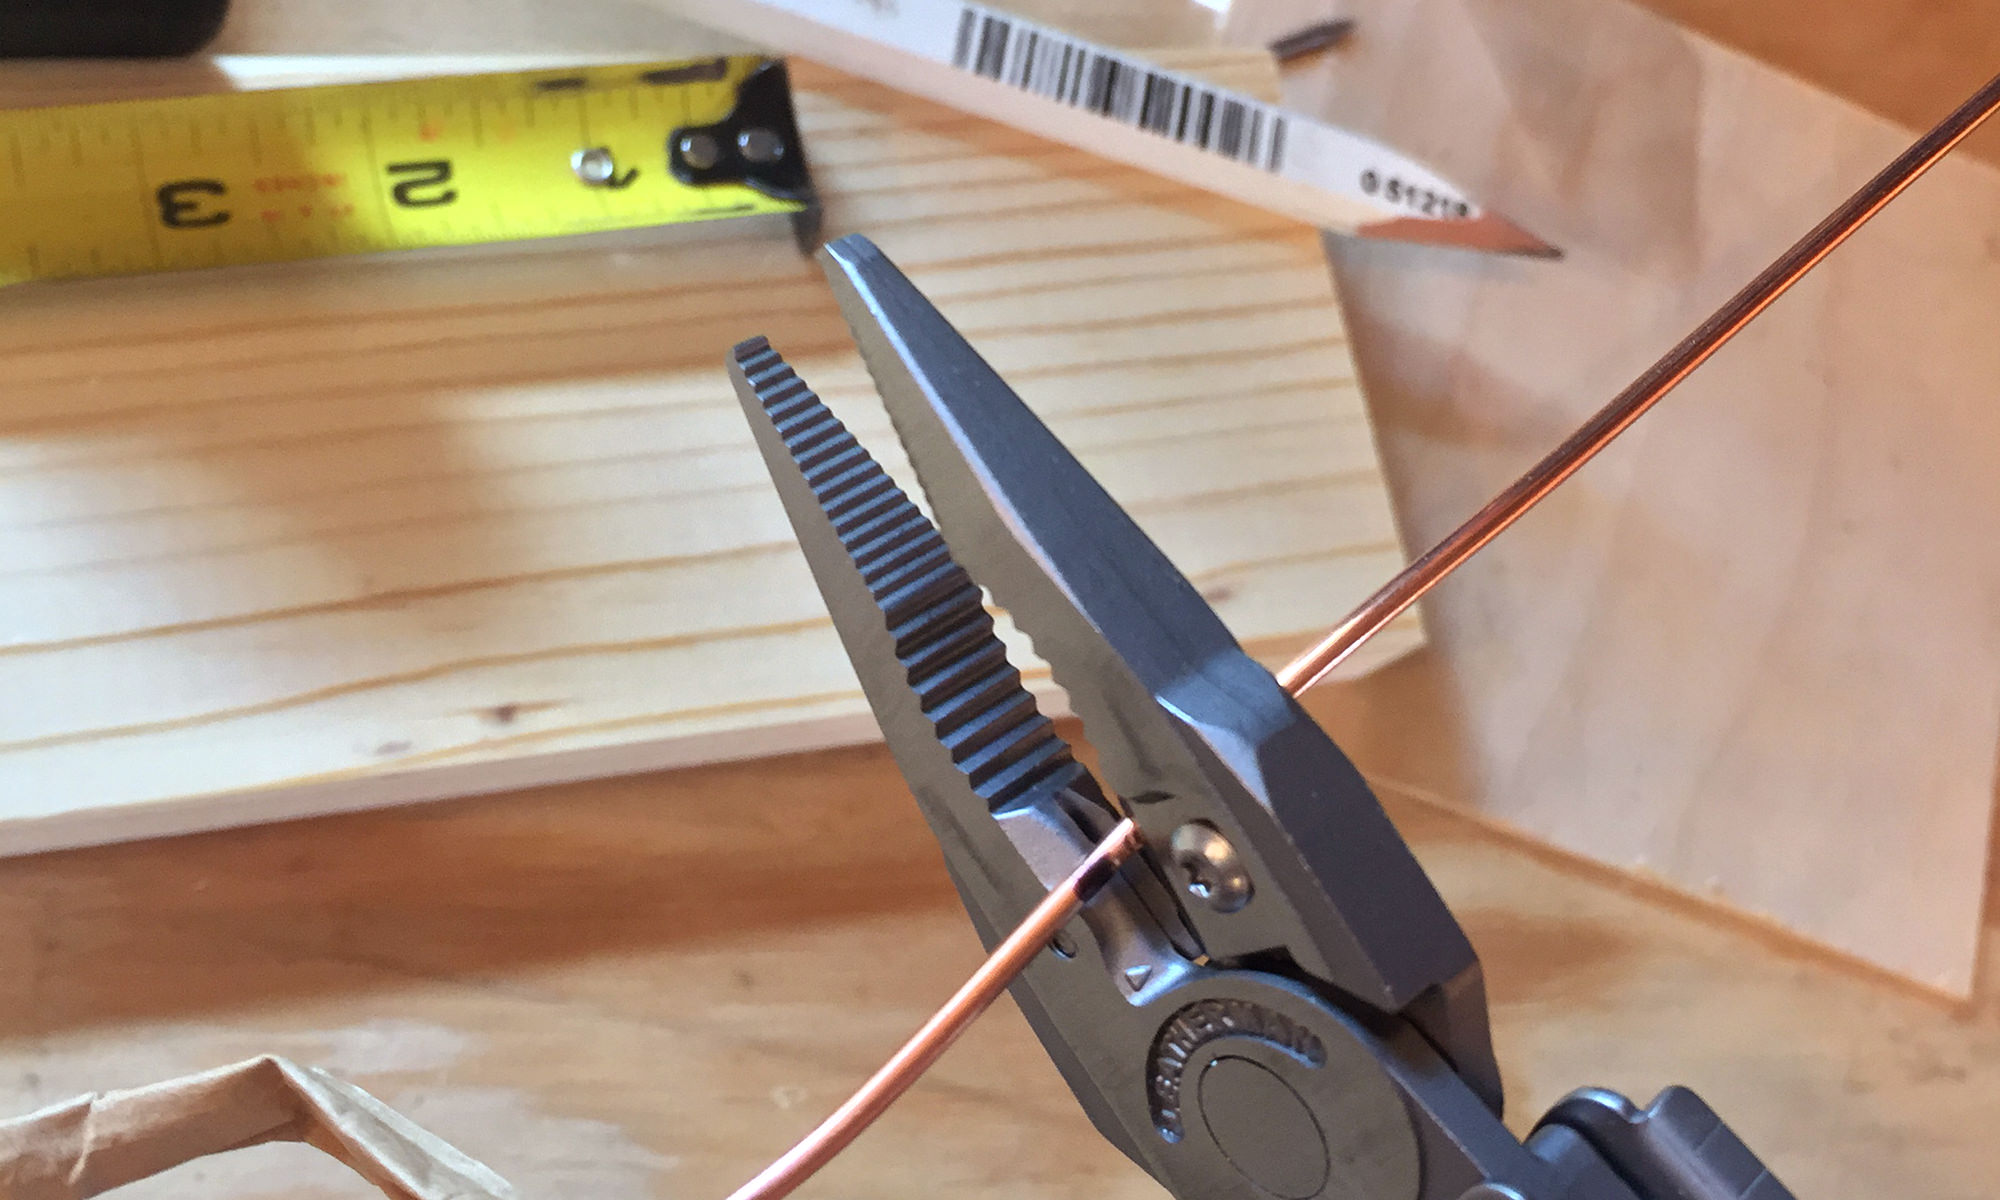 Use the multitool’s wire cutters to cut the 132-inch long copper wire into eight 17-inch-long pieces and then cut the 68-inch piece into two 34 inch long pieces.
 Use the multi-tool’s needle-nose pliers to bend the 17-inch long copper wires into “ears" with three inches of space separating the ends.
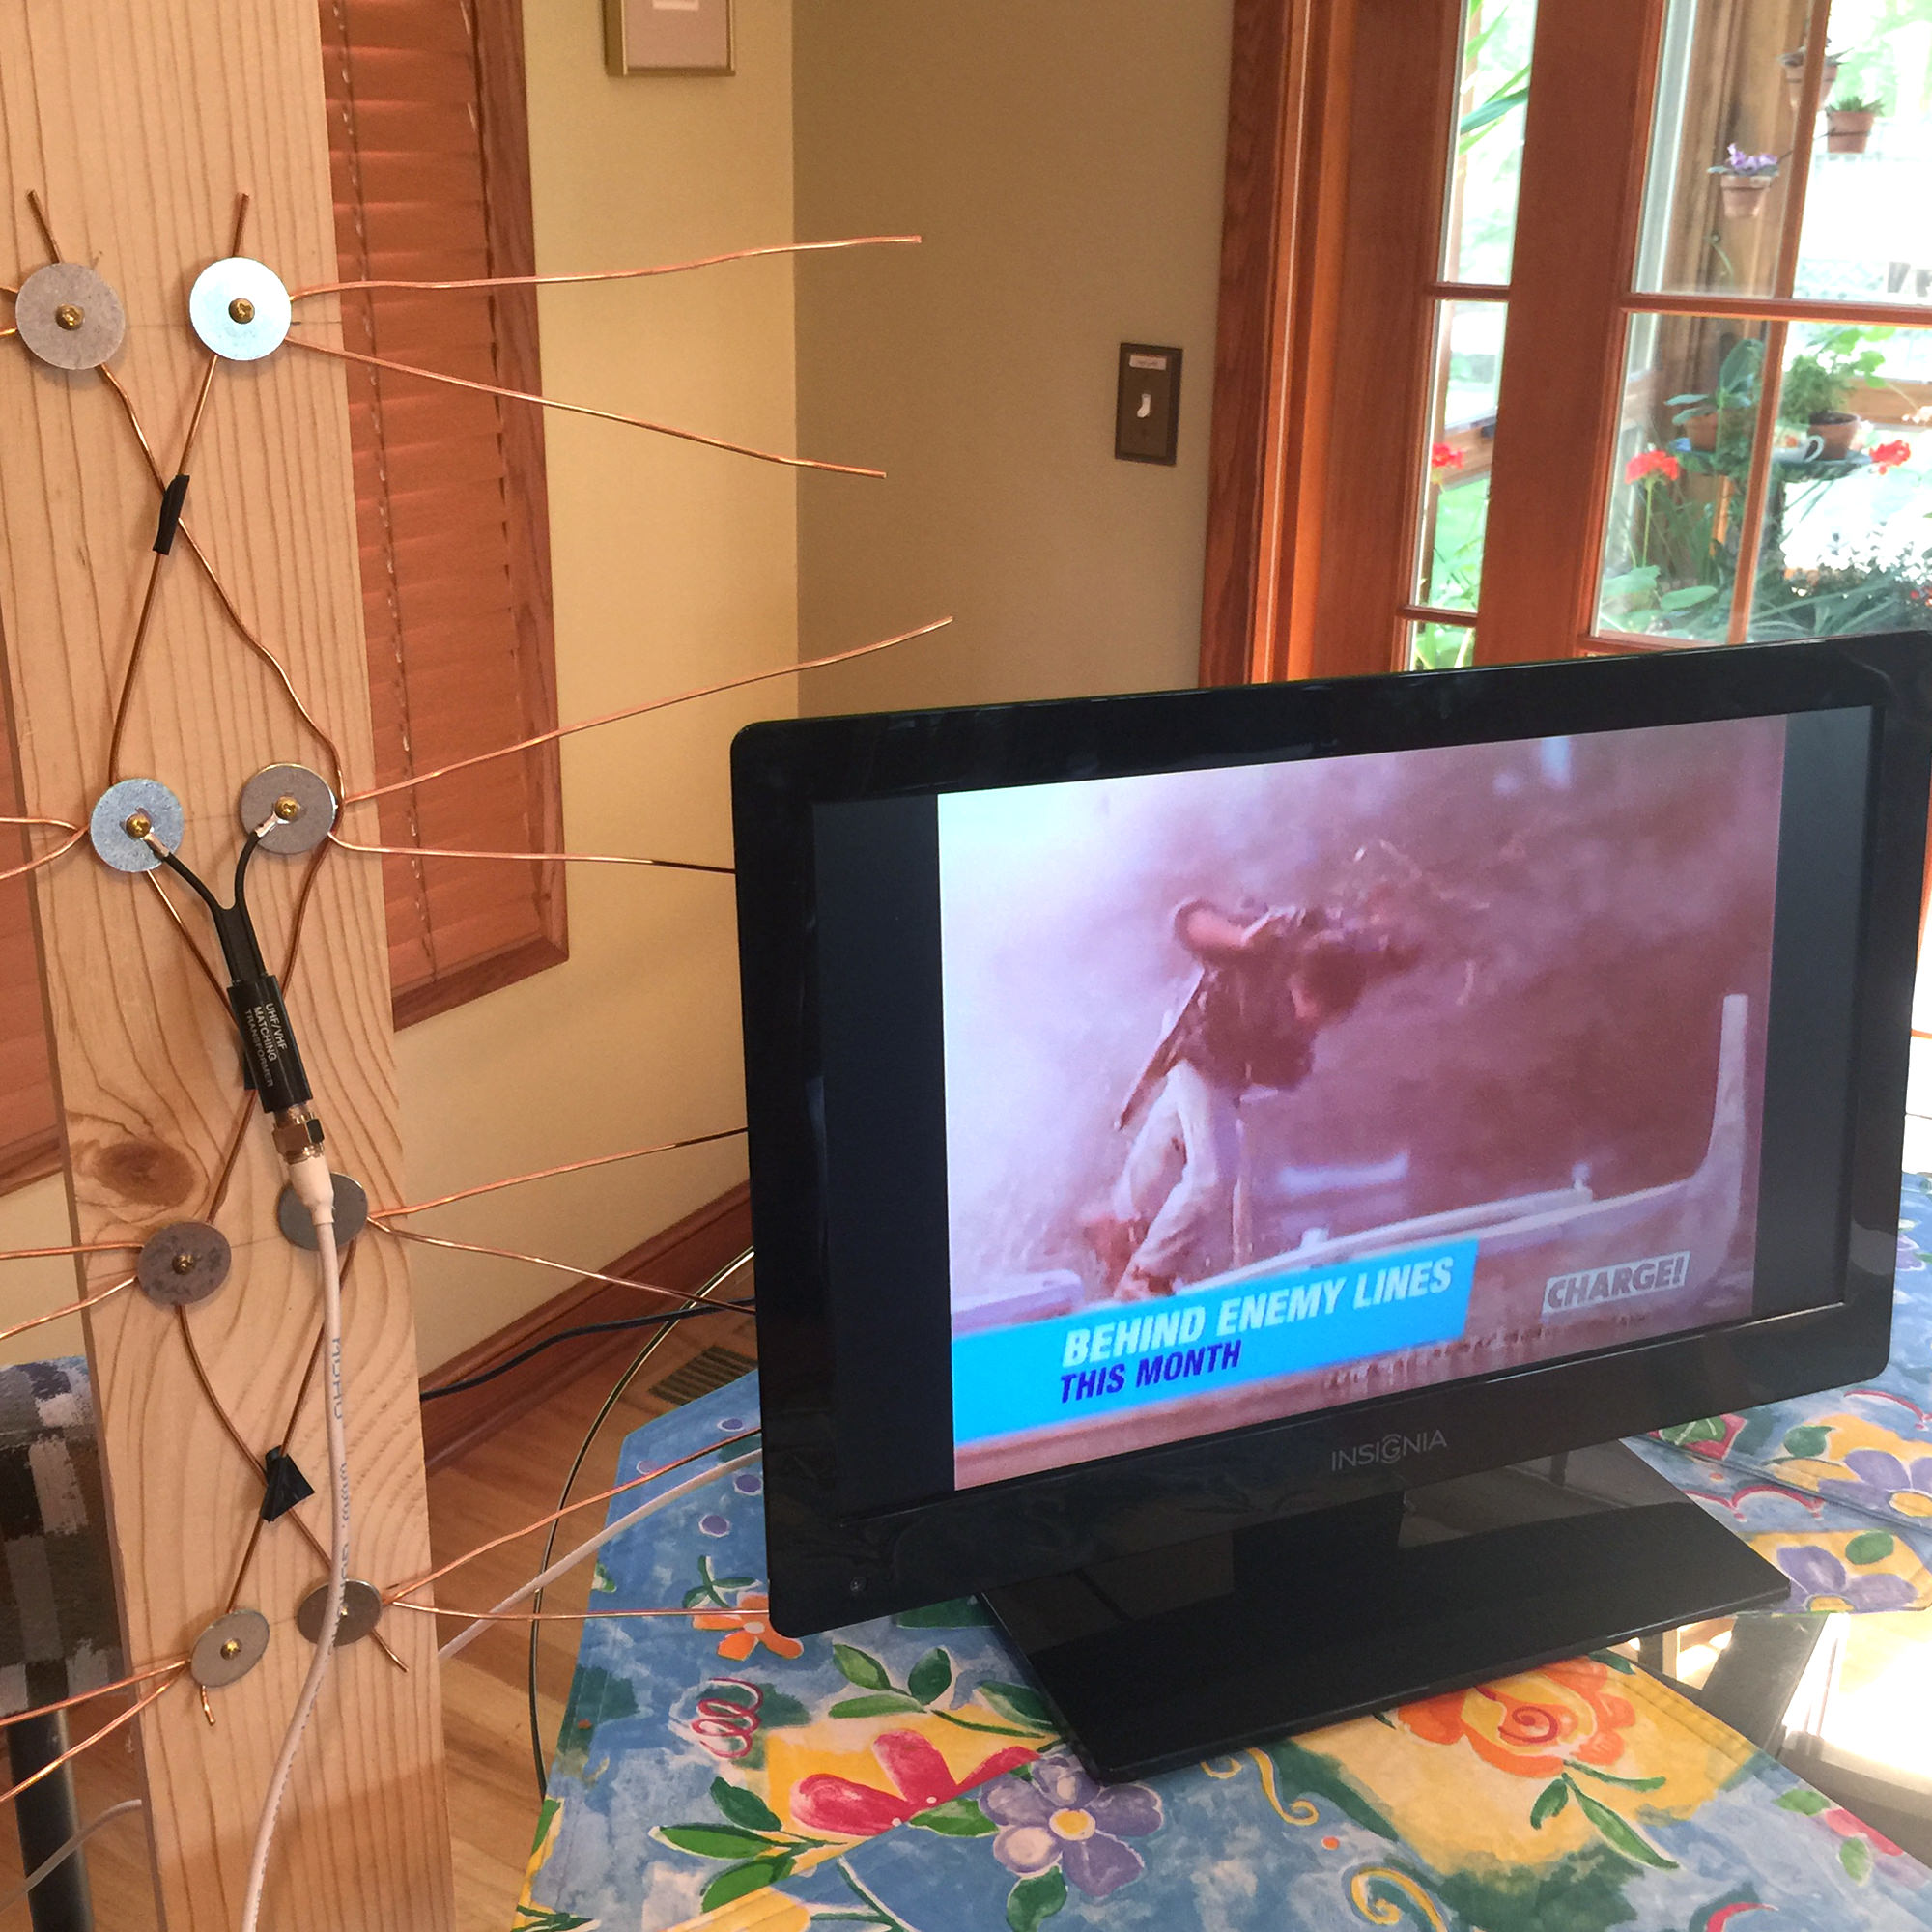
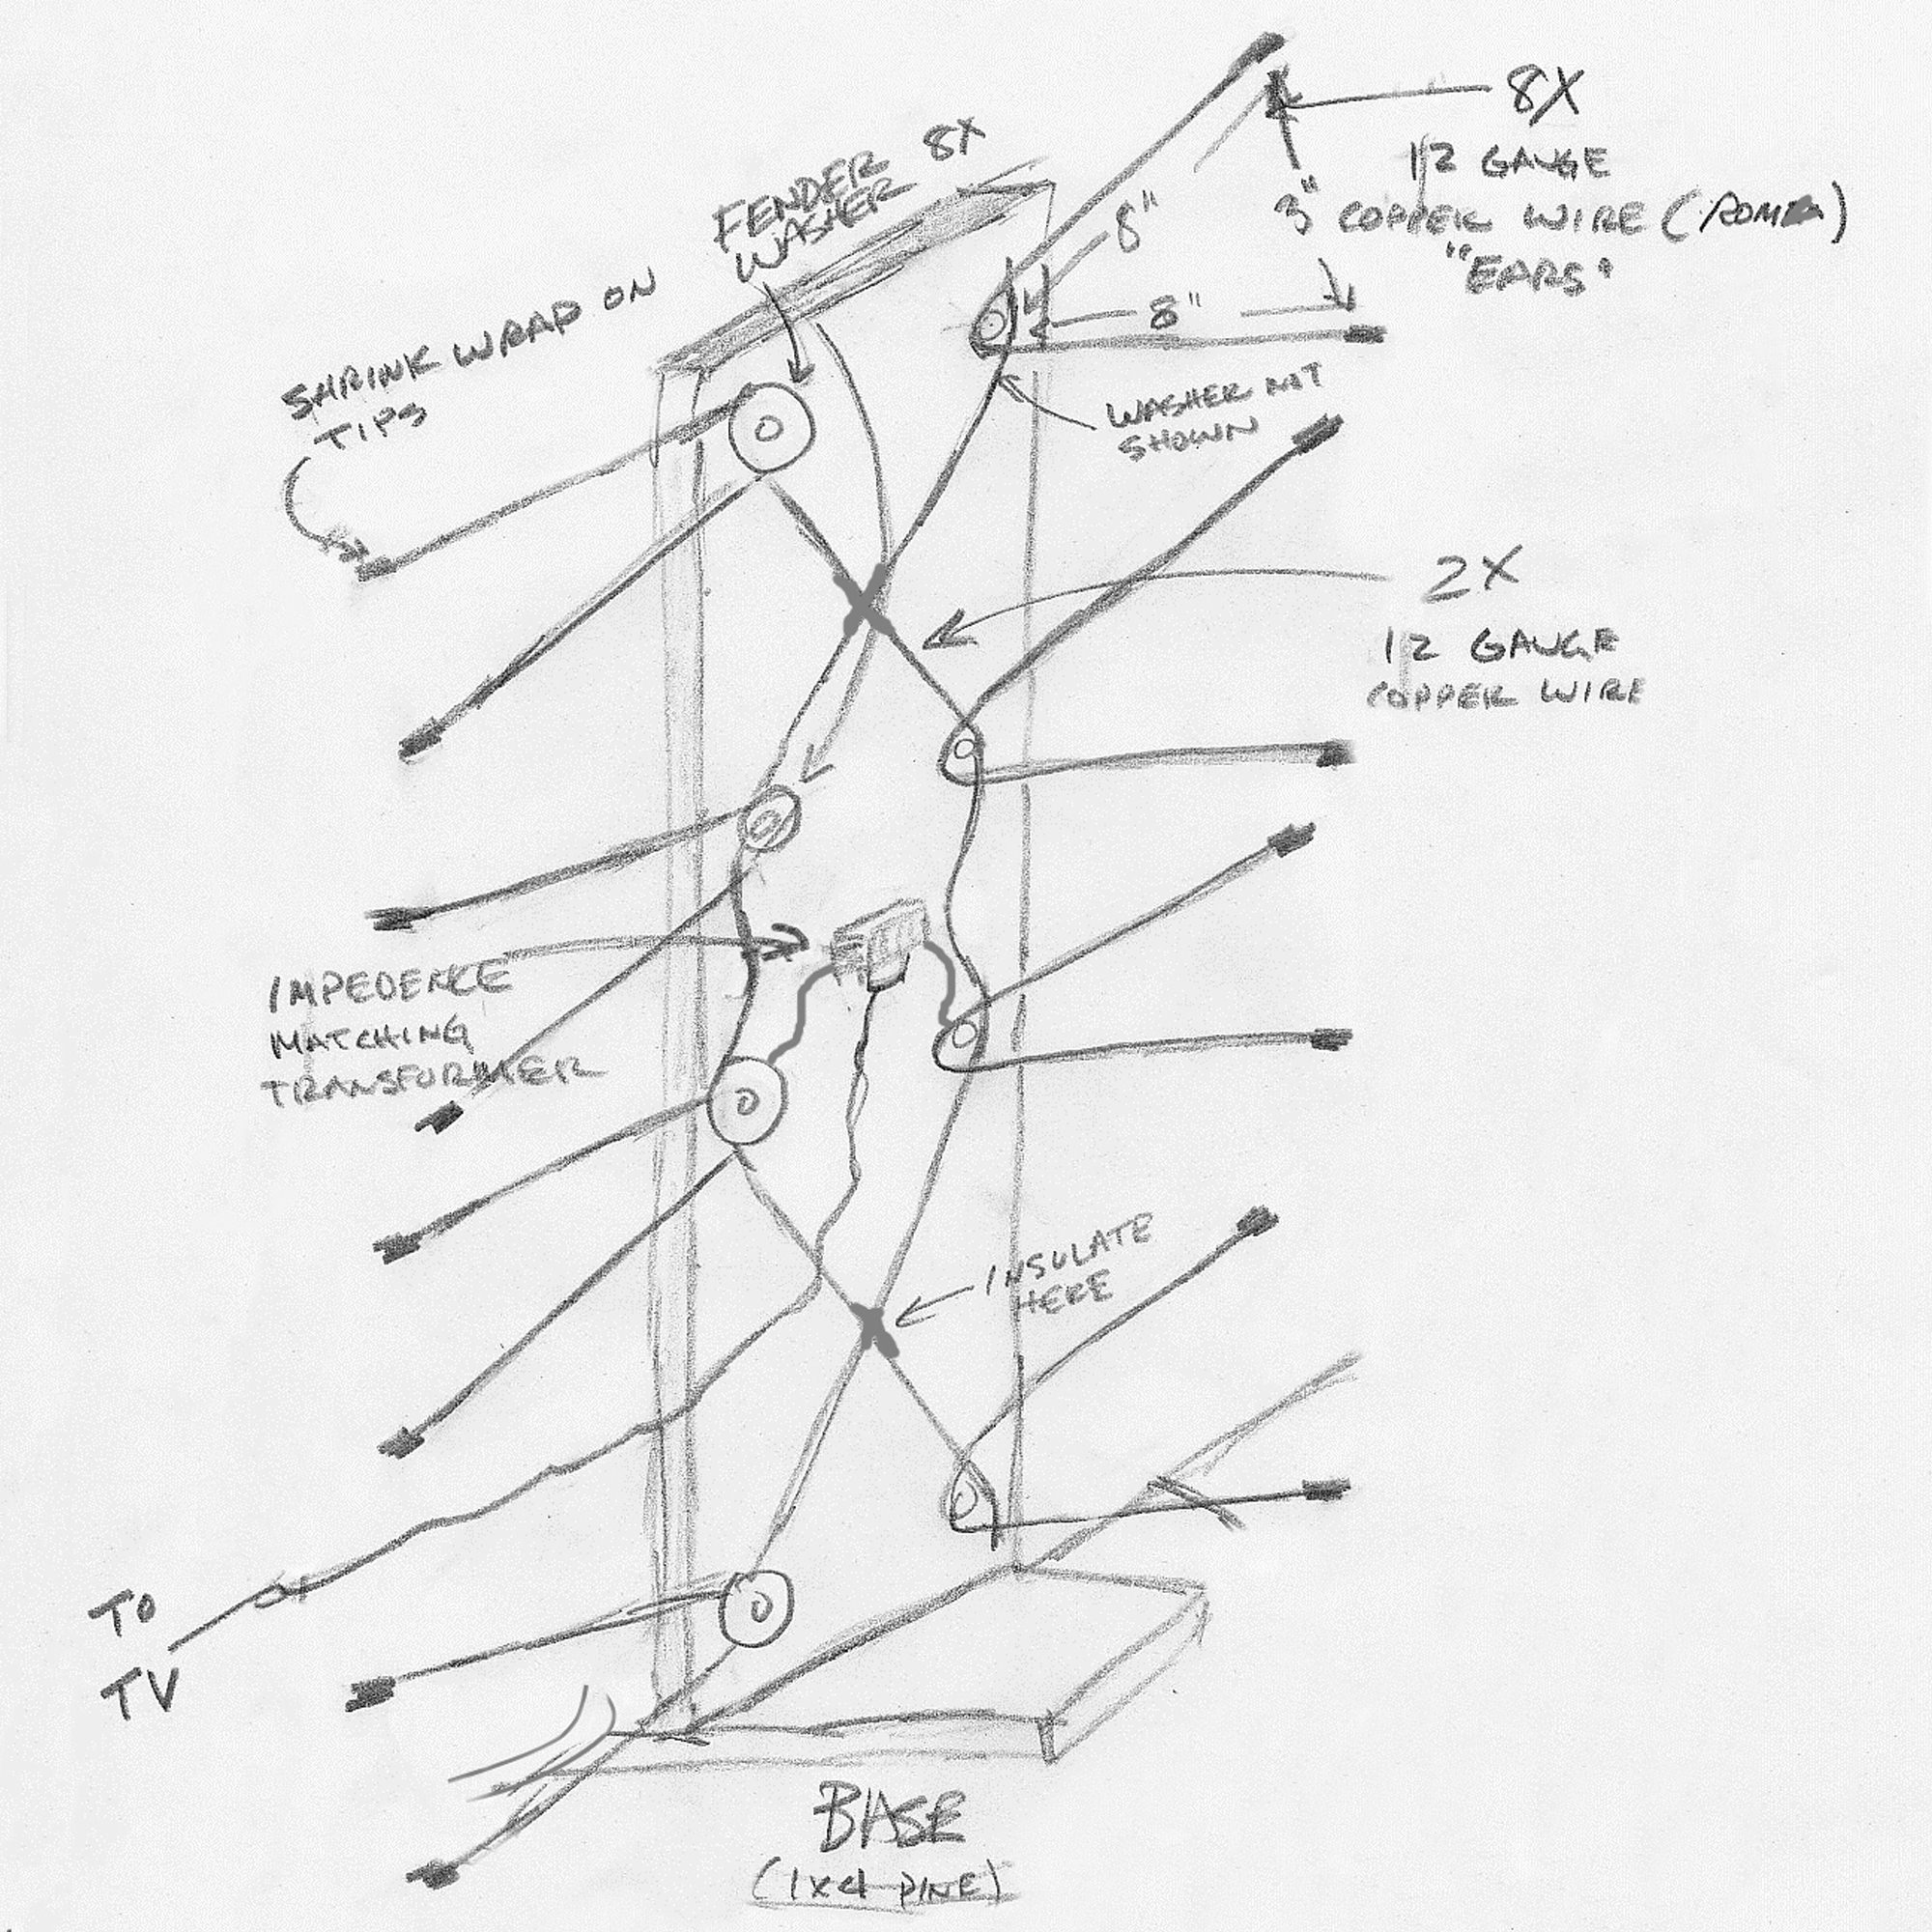
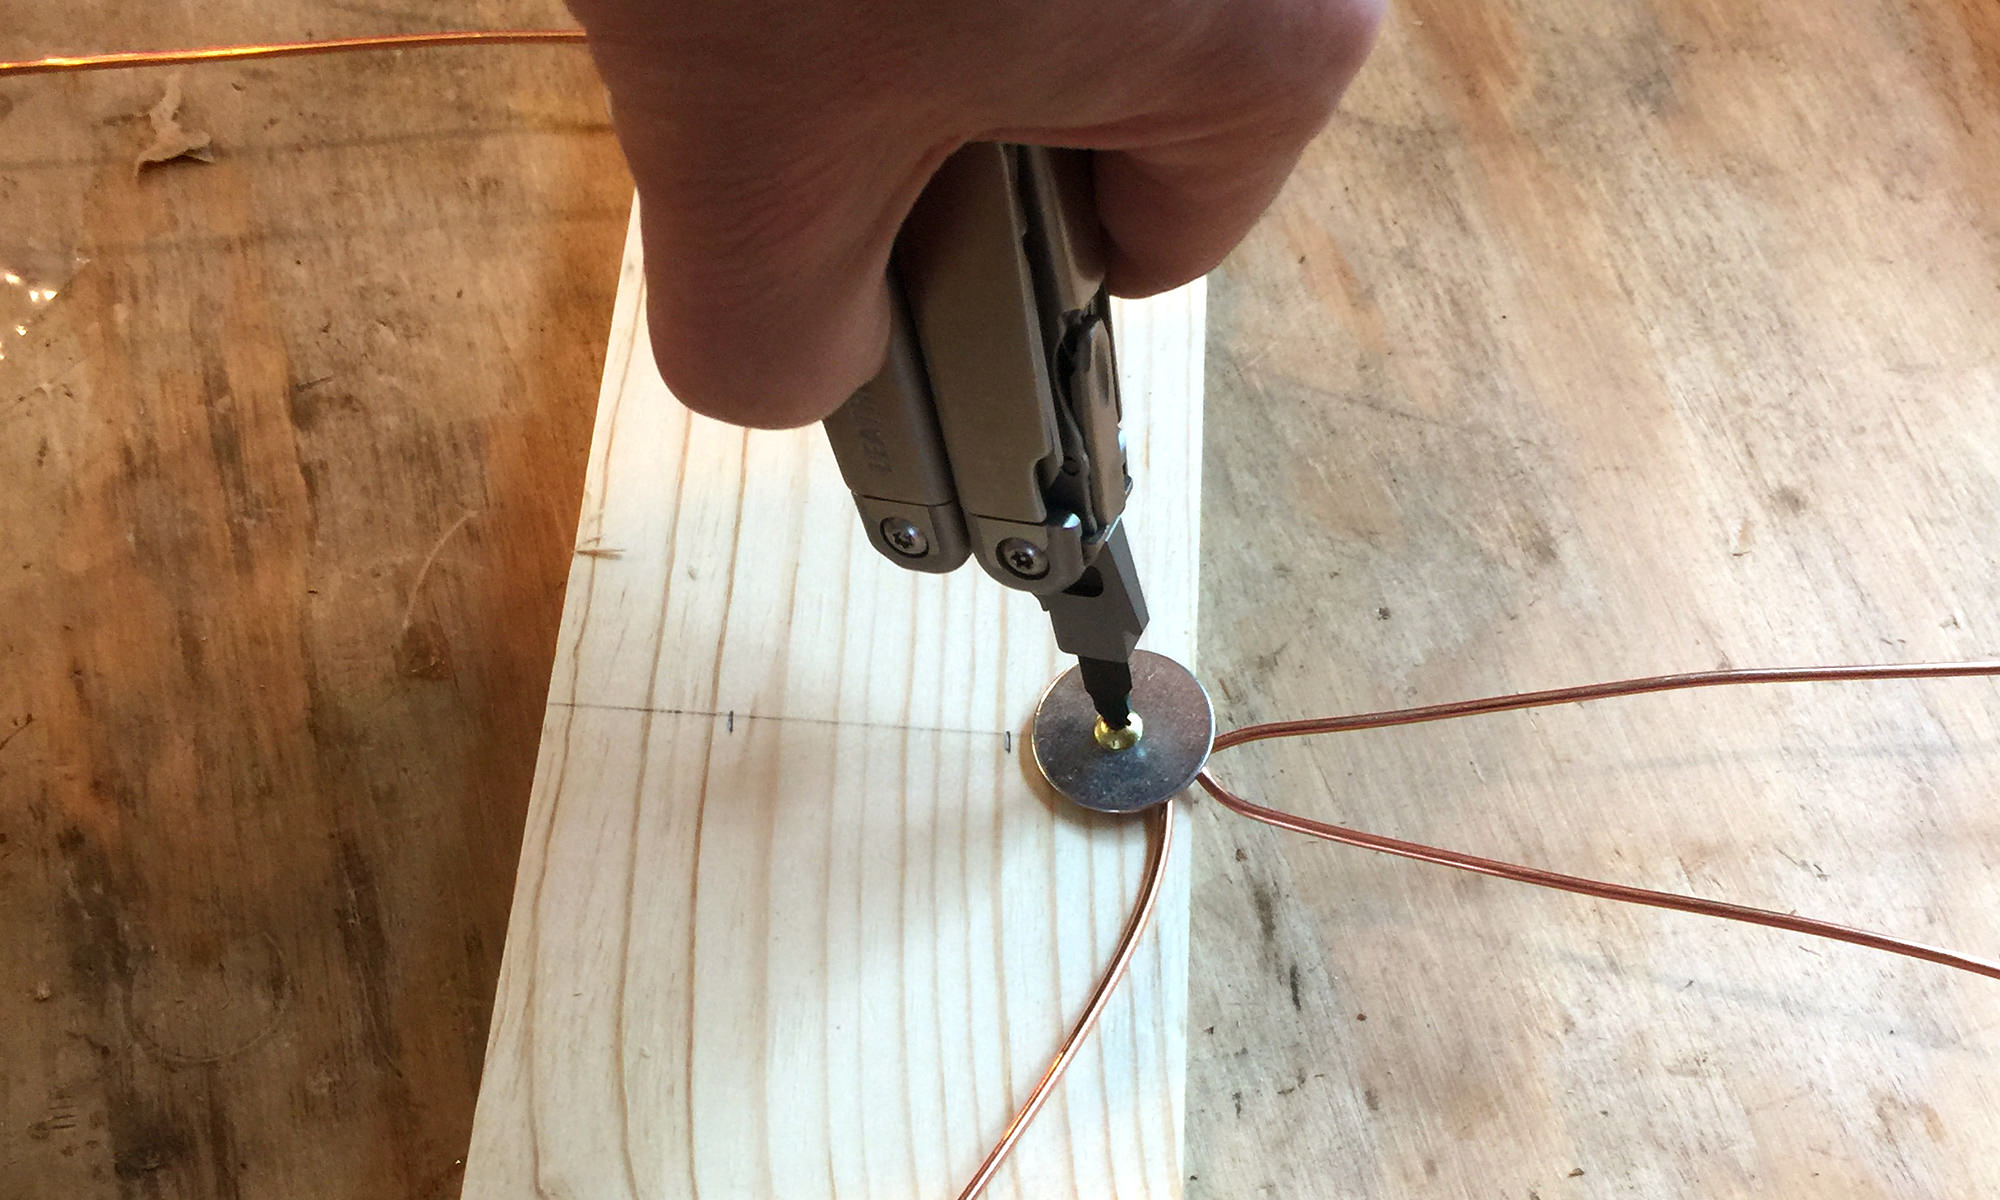 Now, arrange the ears on the board and connect the phasing bars as shown in the diagram. Use your tool’s large bit driver to fasten the #8 screws and fender washers into place.
Use the scissors tool to cut pieces of electrical tape. Place electrical tape between the phasing bars so they are electrically insulated from one another, as shown in the diagram.
Use the bit driver to connect the impedance matching transformer to a #8 screw on each of the phasing bars.
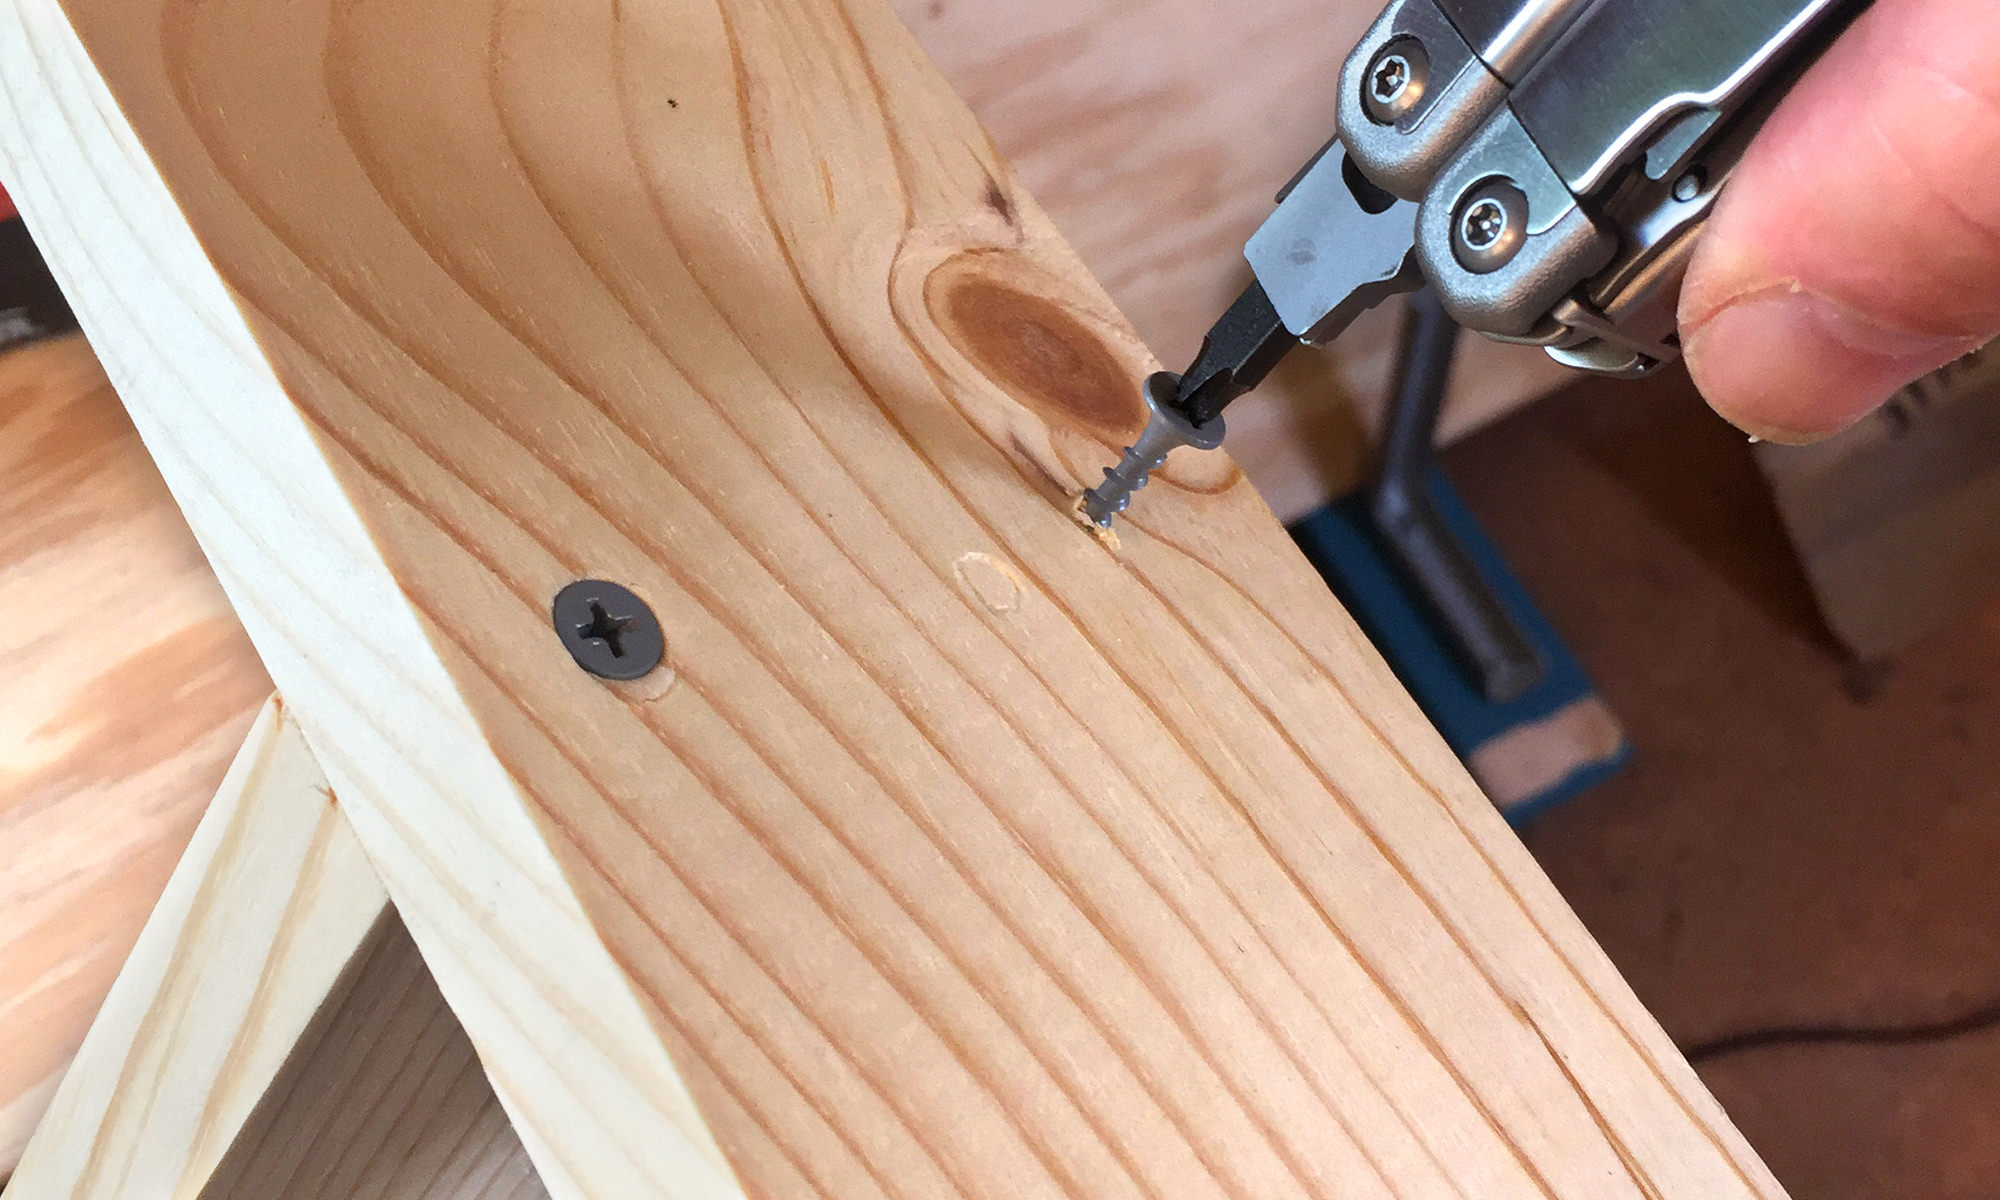 Use the two 1½-inch long screws to attach a 4 x 6 x 1 wood block as a base.
Connect your digital-signal-ready television or converter box to the transformer.
That’s it! Switch on your television, orient your DIY digital antenna for the strongest reception, and enjoy the latest episodes of your favorite show.